VS Code Extension
The CloudZero CostFormation Toolkit for VS Code lets you write, validate, and publish Dimension definitions from your editor. The extension provides autocompletion for all YAML constructs, validates your definitions against the CloudZero platform as you work, and publishes changes without leaving VS Code.
Prefer a visual editor? Most users build Dimensions in Dimension Studio with no code required. The VS Code extension is for teams that prefer managing Dimensions as code in their own editor.
Set up the extension
What you need
- Visual Studio Code v1.74.3 or later
- A CloudZero account with the Modify Dimension Definitions permission
Install the extension
- Open VS Code.
- Select the Extensions icon in the Activity Bar (or press ⇧⌘X / Ctrl+Shift+X).
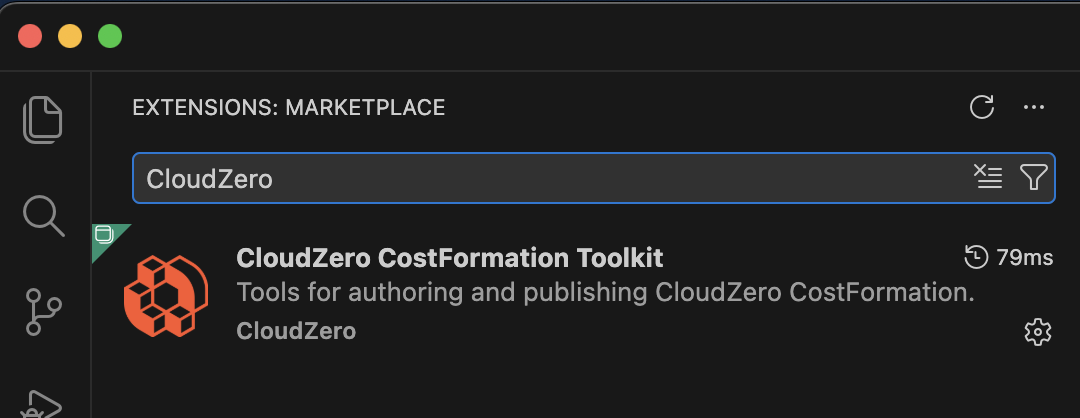
- Search the marketplace for
CloudZero. - Select CloudZero CostFormation Toolkit from the results, then select Install.
Use the extension
Each time you work with your Dimensions, the workflow follows seven steps:
- Log in to CloudZero
- Download your definitions
- Write your Dimensions
- Save to validate
- Review your changes (optional)
- Publish
- Verify in CloudZero
Step 1: Log in to CloudZero
- Open the command palette (⇧⌘P / Ctrl+Shift+P) and select CloudZero: Authenticate.

- Your browser opens the CloudZero login page. Enter your credentials and you are redirected to a success page.

- Close the browser tab and return to VS Code. A notification confirms you are logged in.

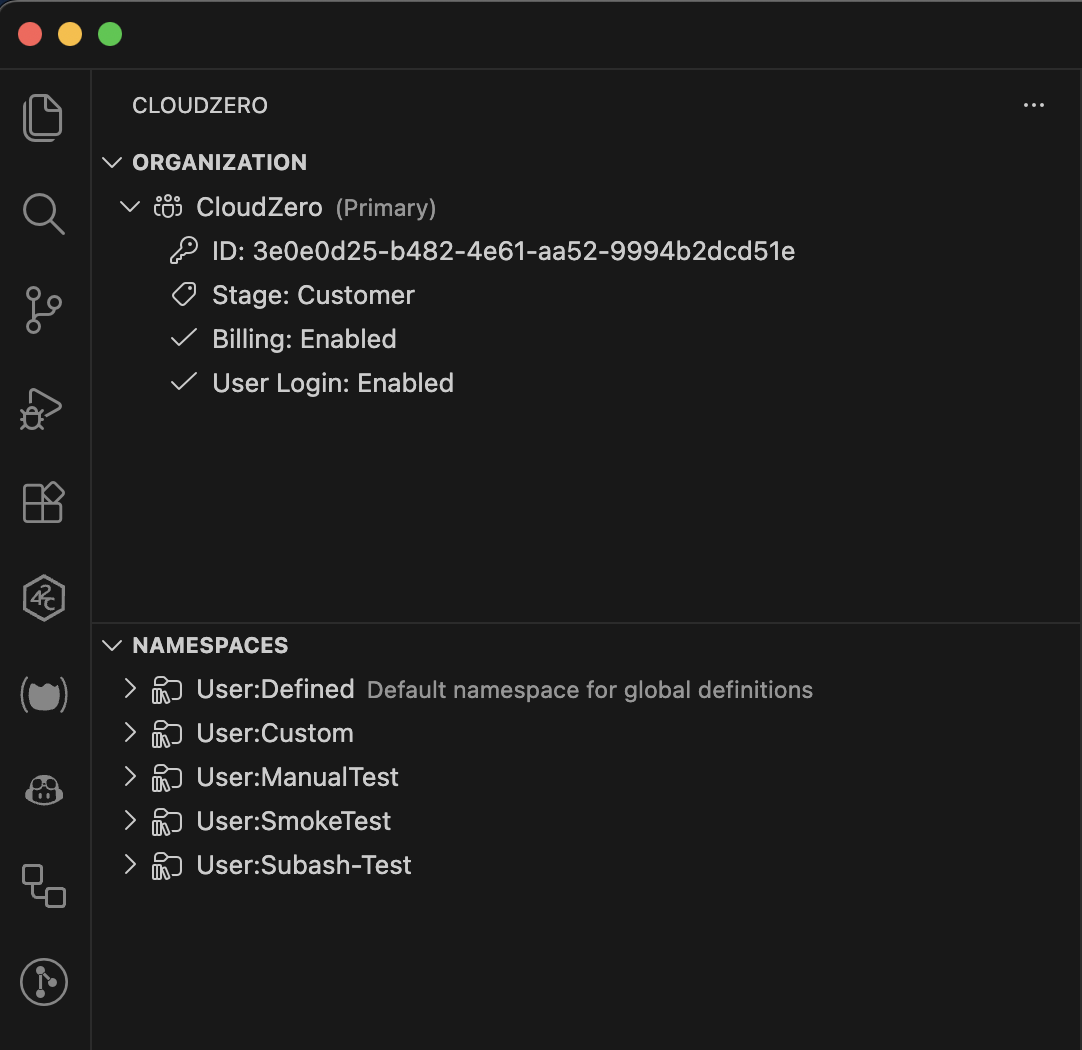
After logging in, a CloudZero icon appears in the VS Code Activity Bar (the vertical icon bar on the left). Click it to open the CloudZero Sidebar, which shows your organization and namespaces.
Step 2: Download your definitions
Download your definitions file so you are working from the latest version. If your organization has not created any Dimensions yet, the file will be empty.
Option A: Use the command palette
- Open the command palette (⇧⌘P / Ctrl+Shift+P) and select CloudZero: Download CostFormation.

- If your organization has multiple namespaces, select the namespace to download from.
- Choose a location and filename in the Save dialog.
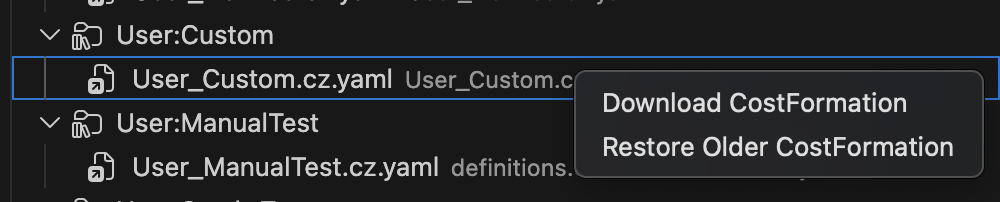
Option B: Use the CloudZero Sidebar
- Right-click a namespace in the CloudZero Sidebar.
- Select Download CostFormation.
- Choose a location and filename in the Save dialog.
Definition files use the
.cz.yamlextension. If you do not specify an extension when saving,.cz.yamlis appended automatically.
Step 3: Write your Dimensions
The extension provides autocompletion as you write. Start typing any of these keywords to see what is available:
| Keyword | What it provides |
|---|---|
example | Complete starter Dimensions: Static Grouping, Dynamic Grouping, Even Allocation, Proportional Allocation |
dimension | Dimension definition structure |
rule | Rule templates for static groups, dynamic groups, and filtered dynamic groups |
condition | Condition templates, with or without scoped sources |
source | Source templates, plus live source IDs from your CloudZero organization (tags, account attributes, Kubernetes labels, and more) |
transforms | Transform section and individual transform templates |
| (in a Streams section) | Live stream names from your CloudZero organization |
For copy-paste Dimension examples you can adapt, see CostFormation Templates. For the complete YAML syntax reference, see CostFormation Reference.
Step 4: Save to validate
The extension validates your definitions automatically:
| When | What it catches |
|---|---|
| As you type | Syntax errors: malformed YAML, invalid keywords, missing fields |
| When you save | Semantic errors: invalid source IDs, dependency cycles, structural problems |
Errors from inline validation appear as red underlines in the editor. Errors from platform validation appear in the VS Code Problems panel. Fix all errors before publishing.
Step 5: Review your changes (optional)
- Open the command palette (⇧⌘P / Ctrl+Shift+P) and select CloudZero: Review CostFormation Changes Against CloudZero. A read-only side-by-side diff opens in a new tab.
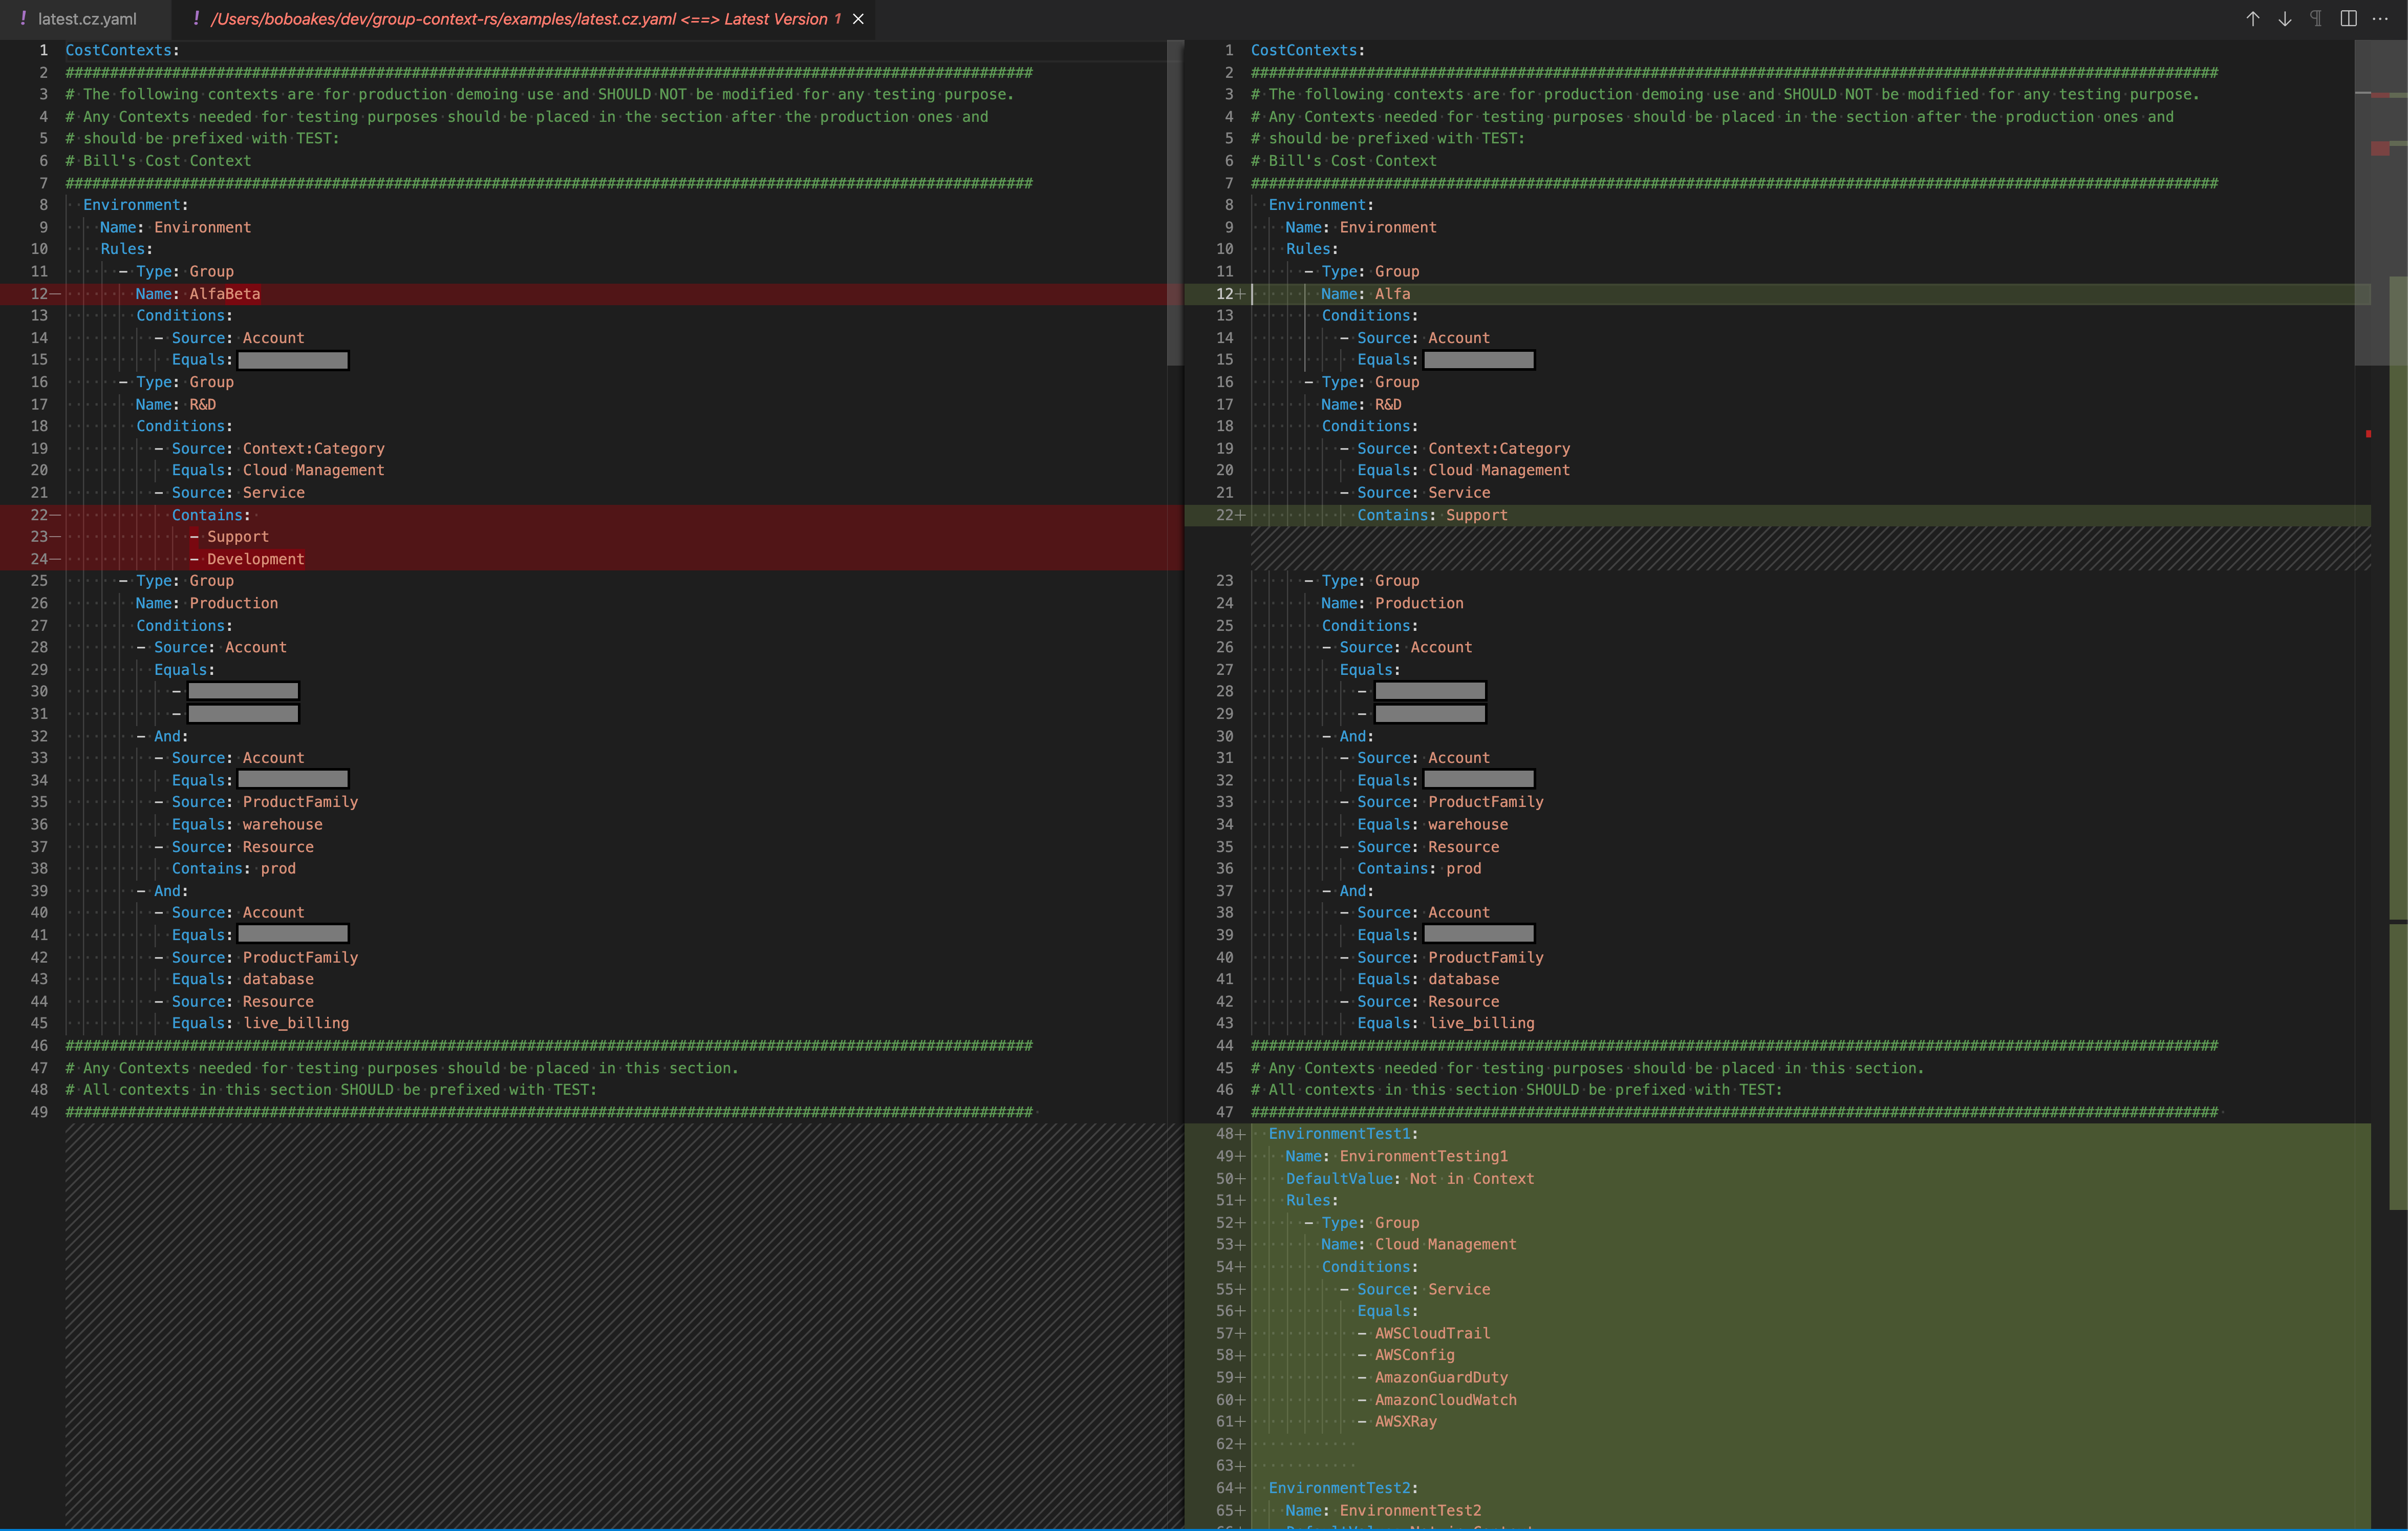
- Review your changes against the published version. If anything needs adjusting, return to your definitions file, make the changes, and save to re-validate.
Step 6: Publish
- Open the command palette (⇧⌘P / Ctrl+Shift+P) and select CloudZero: Publish CostFormation.

- The extension validates your definitions. If validation passes, the definitions are published to the namespace associated with the file. If validation fails, the publish is blocked, errors appear in the Problems panel, and the affected lines are underlined in red.
Step 7: Verify in CloudZero
After publishing, CloudZero begins materializing your Dimensions. Changes are retroactive, applied across your full cost history, and appear in Explorer within a few minutes.
Restore a previous version of your definitions
If you publish definitions that need to be reverted, you can restore a previous version.
- Open the command palette (⇧⌘P / Ctrl+Shift+P) and select CloudZero: Restore Older CostFormation, or right-click a definition file in the sidebar and select Restore Older CostFormation.
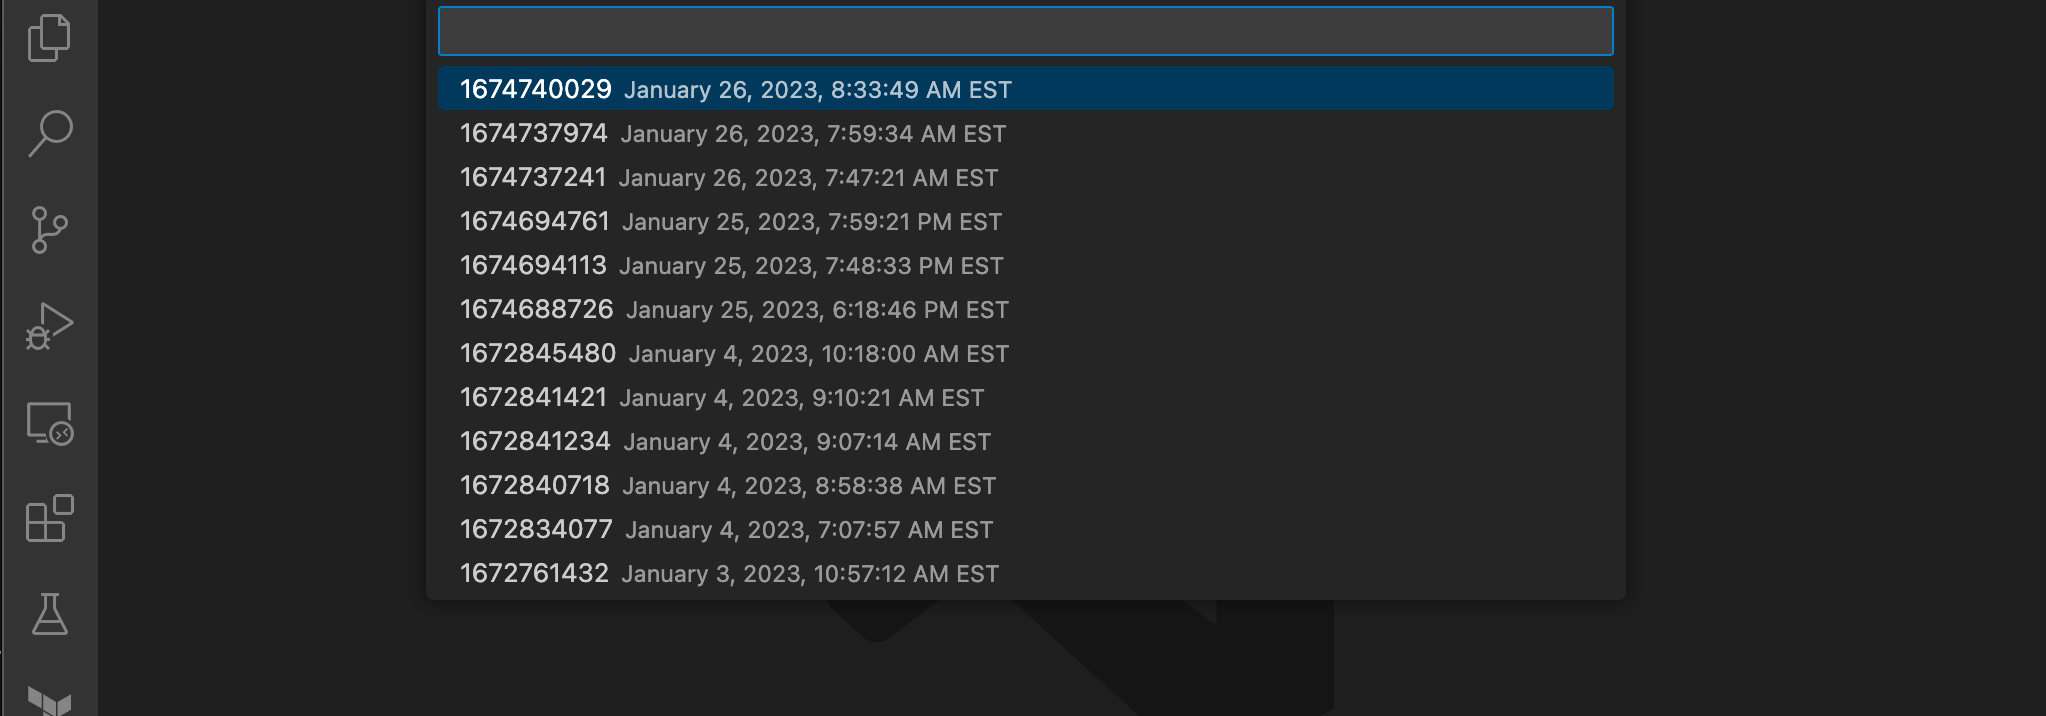
- Select the version to restore from the list (most recent first).
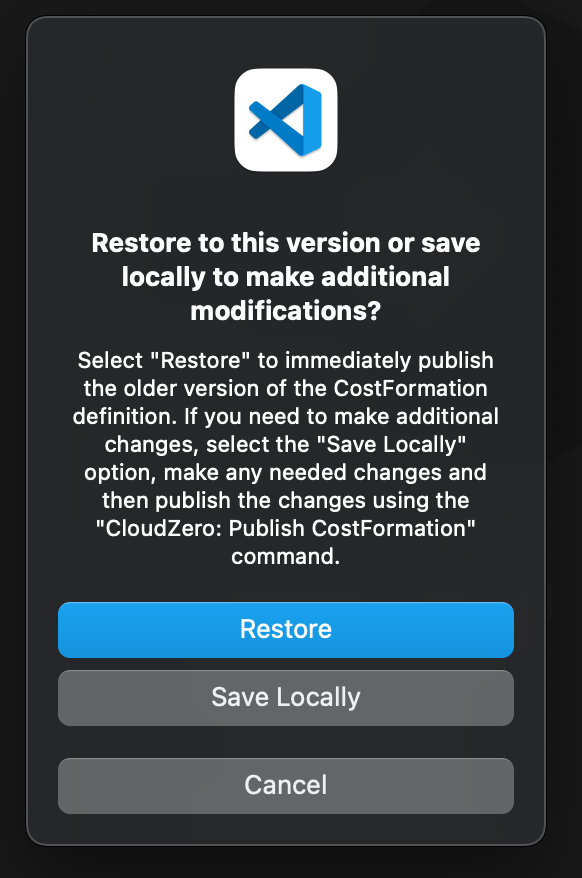
- Choose Restore to publish that version immediately, or Save Locally to download it for further editing before publishing.
Restoring does not delete any versions. It republishes the older version you selected as the new latest version. Your full version history is preserved, so you can always go back again if needed.
For namespaces, conflict resolution, telemetry annotations, and troubleshooting, see Advanced Usage.
Command reference
| Command | What it does |
|---|---|
| CloudZero: Authenticate | Log in to the CloudZero platform |
| CloudZero: Download CostFormation | Download definitions for a namespace |
| CloudZero: Publish CostFormation | Publish definitions to CloudZero |
| CloudZero: Review CostFormation Changes Against CloudZero | Open a side-by-side diff of local vs. published definitions |
| CloudZero: Restore Older CostFormation | Restore a previous version of definitions |
| CloudZero: Switch Organization | Switch to a different CloudZero organization |
| CloudZero Namespaces: Browse All | Browse all namespaces in a searchable list |
| CloudZero Namespaces: New Namespace | Create a new namespace |
| CloudZero Namespaces: Refresh Namespaces | Refresh the namespace list |
| CloudZero Namespaces: Remove Namespace | Delete a namespace |
Have questions or feedback? Reach out to your account manager.
Updated about 2 months ago