Enterprise Agreement (EA)
Connect your Enterprise Agreement (EA) account to CloudZero in five steps and see your Azure costs in a unified view within 24 hours. CloudZero connects through a read-only application registered in your Azure tenant (called a service principal). CloudZero uses the EnrollmentReader role, which provides read-only access to usage, billing, and discount data across all accounts and subscriptions in your enrollment. EA connections do not include invoice data such as taxes and fees.
For full details on what CloudZero accesses, see Azure Permissions and Security.
Overview
Connecting an EA account takes five steps:
- Retrieve IDs from Azure
- Configure the connection in CloudZero
- Authorize CloudZero in your Azure tenant
- Grant CloudZero read access to your billing data
- Verify the connection
What you need
- CloudZero user with data configuration permissions
- In Azure, the Billing Account Owner role on the billing account you plan to connect (required to assign the EnrollmentReader role to the CloudZero application)
CloudZero supports Azure cost data in USD. If your Azure costs are billed in a different currency, reach out to your account manager.
Step 1: Retrieve IDs from Azure
You need two IDs: your tenant ID and your billing account ID.
Retrieve your tenant ID
- In the Azure Portal, navigate to your tenant directory (Microsoft Entra ID).
- Copy the Tenant ID for use in Step 2.

Retrieve your billing account ID
- Navigate to Cost Management + Billing and select the billing account you plan to connect.
- In the left menu, under Settings, select Properties.
- Copy the 8-digit Billing Account ID for use in Step 2.
Step 2: Configure the connection in CloudZero
- In CloudZero, go to Settings > Cloud Connections.
- Select Create Connection +.
- Select the Azure tile, then choose the Billing tile.
- Enter a Connection Name using letters, numbers, hyphens, or underscores only.
- Select Enterprise Agreement from the Azure Agreement Type drop-down menu.
- Paste the tenant ID you copied in Step 1 into the Tenant ID field.
- Paste the billing account ID you copied in Step 1 into the Billing Account ID field.
- Select Create Connection.
Step 3: Authorize CloudZero in your Azure tenant
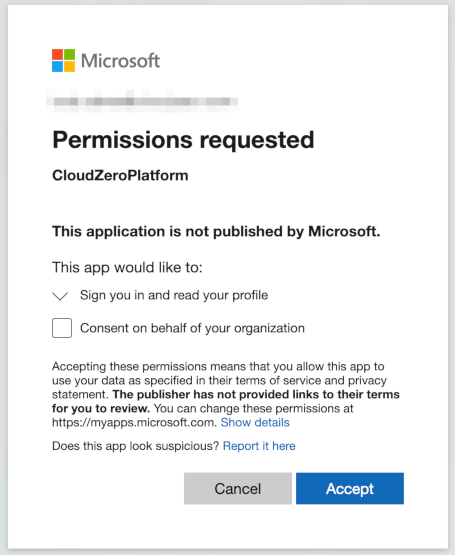
If you have not connected this tenant to CloudZero before, CloudZero redirects you to Azure to register the CloudZeroPlatform application (service principal) in your tenant.
If you have already granted this authorization, proceed to Step 4.
- In Azure, check the Consent on behalf of your organization box.
- Select Accept.
Azure registers the application in your tenant and redirects you to CloudZero.
It can take an hour or more for Azure to finish registering the application.
If approving the CloudZeroPlatform application through Azure's Admin Consent Requests results in the message
Consent for CloudZeroPlatform was cancelled by user, have a user with the Global Administrator role (activated through Azure Privileged Identity Management if your organization uses PIM) perform Step 2 and Step 3.
Step 4: Grant CloudZero read access to your billing data
The EnrollmentReader role cannot be assigned through the Azure Portal. You can use the CloudZero PowerShell script (Option A) or assign the role through Azure's REST API (Option B).
You must have the Billing Account Owner role on the billing account to assign the EnrollmentReader role to the CloudZero application.
Option A: Use the CloudZero PowerShell script
-
Open a PowerShell session. You can use Azure Cloud Shell (select PowerShell if prompted) or run PowerShell locally. If running locally, install the Azure PowerShell module and sign in with Connect-AzAccount.
-
Download the script:
- Cloud Shell or command line: Run the following command:
Invoke-WebRequest -Uri "https://raw.githubusercontent.com/Cloudzero/provision-account/develop/azure/cz_azure_billing_permissions_setup.ps1" -OutFile "./cz_azure_billing_permissions_setup.ps1" - Manual download: Download the script from the CloudZero provision-account repository and place it in your working directory. For full usage details, see the README.
- Cloud Shell or command line: Run the following command:
-
Run the script with the billing account ID you copied in Step 1:
./cz_azure_billing_permissions_setup.ps1 -BillingAccountId <your-billing-account-id> -
Proceed to Step 5.
Option B: Assign the role using the Azure REST API
Because the EnrollmentReader role is not available in the Azure Portal, this method uses Azure's interactive REST API documentation to assign the role.
Get the CloudZeroPlatform Object ID
- In the Azure Portal, navigate to Enterprise applications.
- Select the CloudZeroPlatform application.
- On the Overview page, in the Properties section, copy the Object ID for use in a later step.

Assign the EnrollmentReader role
- Open the Role Assignments - Put page in Azure's REST API documentation. This page provides an interactive form that lets you assign billing roles by sending requests directly to Azure's API.
- Select the Try it button to open the interactive request form.

-
Sign in with your account credentials to the tenant with the enrollment access you want to assign.
-
In the Parameters section, enter the following values:
Parameter Value billingAccountNameThe 8-digit billing account ID from Step 1 billingRoleAssignmentNameA randomly generated GUID (see note below) api-version2019-10-01-previewGenerating a GUID for
billingRoleAssignmentName: Azure uses this value as a unique name for the role assignment. No specific value is required; any valid GUID works. Generate one using a tool like the Online GUID Generator, or runNew-Guidin PowerShell. Copy your generated GUID and paste it into the field. -
Copy the following JSON and paste it into the Body section, replacing the three placeholders:
{
  "properties": {
    "principalId": "{YOUR-OBJECT-ID}",
    "principalTenantId": "{YOUR-TENANT-ID}",
    "roleDefinitionId": "/providers/Microsoft.Billing/billingAccounts/{YOUR-BILLING-ACCOUNT-ID}/billingRoleDefinitions/24f8edb6-1668-4659-b5e2-40bb5f3a7d7e"
  }
}
Placeholder Replace with {YOUR-OBJECT-ID}The CloudZeroPlatform Object ID copied above {YOUR-TENANT-ID}The tenant ID from Step 1 {YOUR-BILLING-ACCOUNT-ID}The 8-digit billing account ID from Step 1 The value
24f8edb6-1668-4659-b5e2-40bb5f3a7d7eis the role definition ID for the EnrollmentReader role. -
Verify that the Request Preview URL matches this format:
https://management.azure.com/providers/Microsoft.Billing/billingAccounts/{billingAccountName}/billingRoleAssignments/{billingRoleAssignmentName}?api-version=2019-10-01-preview

- Select Run. A
200 OKresponse confirms the role was assigned successfully.
If you receive an error, see Azure's troubleshooting documentation.
Step 5: Verify the connection
- In CloudZero, go to Settings > Cloud Connections.
- Select the newly created Azure connection in the Billing Connections table.

On the connection details page, you can see the connection status, tenant ID, billing account ID, agreement type, and ingestion timestamps.

What to expect
After CloudZero processes the first data ingest, the connection status changes from Pending Data to Healthy. This can take several hours. Cost data appears in the Explorer within a day.
You can connect additional Azure accounts at any time by repeating this process. CloudZero supports organizations with multiple tenants.
Once your billing connection is active, you can also connect resource metadata for deeper cost analysis.
If your organization is migrating to a Microsoft Customer Agreement, see Migrating from an Enterprise Agreement on the MCA page.
Have questions or feedback? Reach out to your account manager.
Updated 2 months ago