Query CloudZero Data in Snowflake
Snowflake Data Shares let you query your CloudZero cost data directly from your own Snowflake account. You create Snowflake Views in CloudZero that define what data to share, and CloudZero manages the underlying Snowflake Data Share to your selected Snowflake accounts.
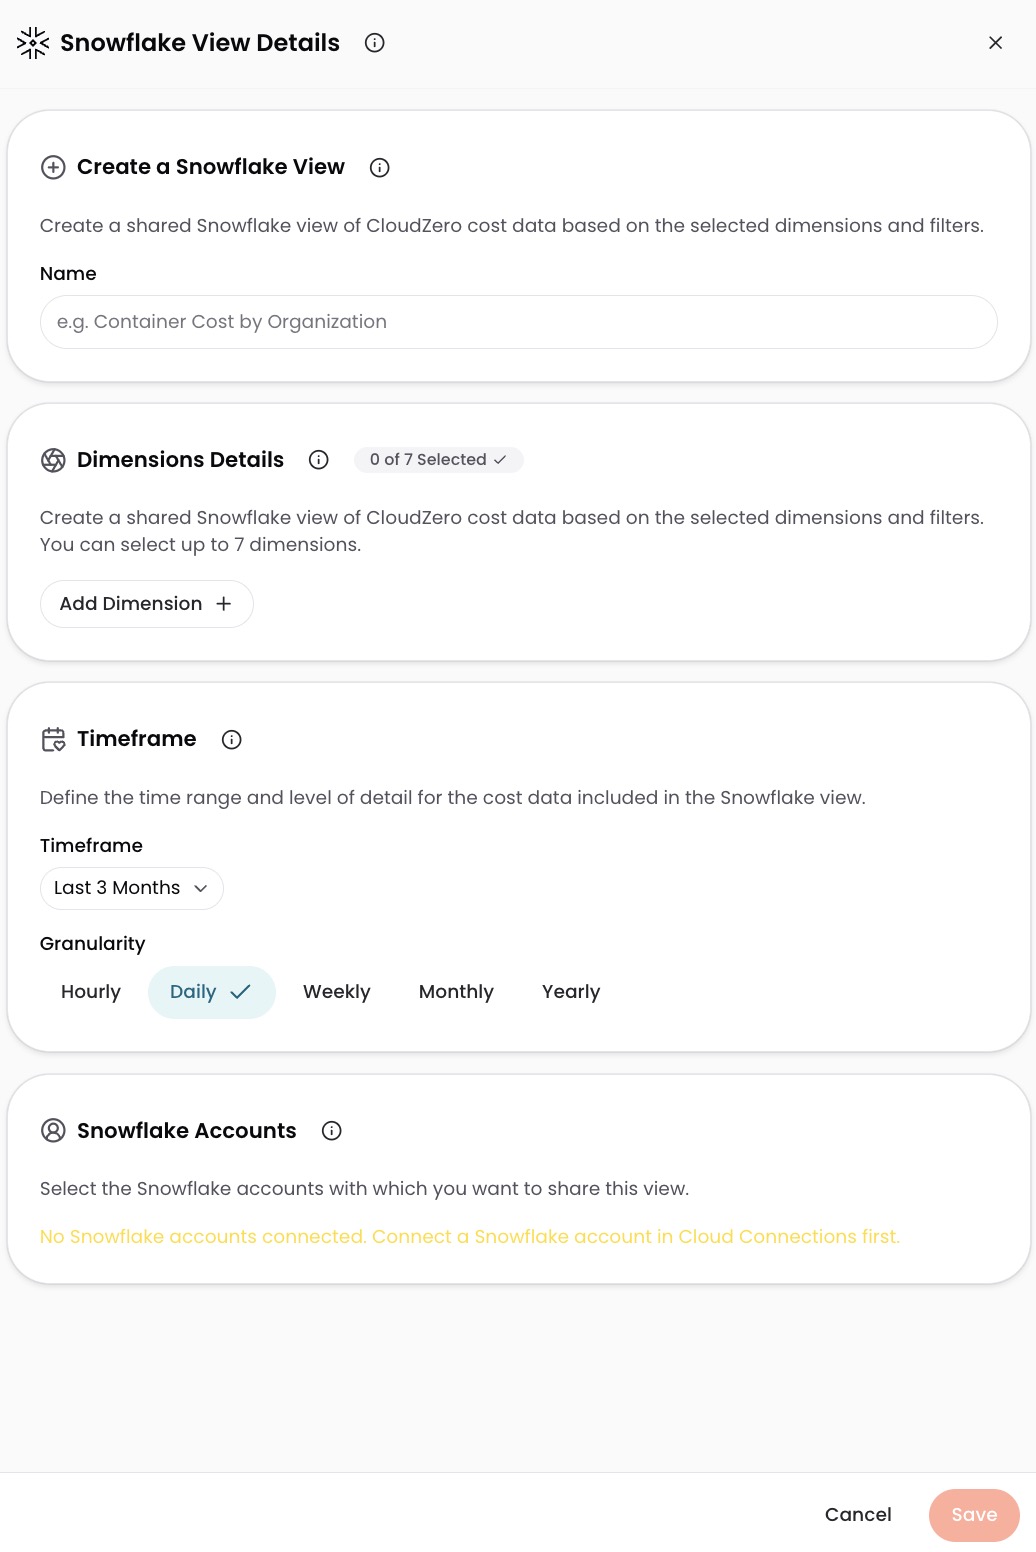
What you need
- A CloudZero Role with permissions to manage Data Sharing
- A Snowflake connection already configured in CloudZero
- A Snowflake account in the AWS us-east-1 region. For other regions, use Snowflake cross-region replication.
Create a Snowflake View
- In CloudZero, navigate to Settings > Snowflake Data Sharing.
- Select Create Snowflake View.
- Enter a name for the Snowflake View.
- Select the Dimensions to include in the Data Share.
- Select the time range for the data.
- Select the granularity (daily, monthly, etc.).
- Select the Snowflake accounts to share with. Only accounts already connected to CloudZero are available.
- Select Save.
Edit a Snowflake View
- Select the three-dot Actions menu on the Snowflake View's row and select Edit.
- Make your changes.
- Select Save.
Changes propagate to your selected Snowflake accounts within a few minutes. If you add new Dimensions, the updated data appears after the next data ingestion and processing.
Renaming a Snowflake View removes the original from the Data Share and creates a new one.
Delete a Snowflake View
- Select the three-dot Actions menu on the Snowflake View's row and select Delete.
- Confirm the deletion.
The deletion propagates to your selected Snowflake accounts within a few minutes.
Access the Data Share from Snowflake
After you create and share a Snowflake View, follow these steps in the target Snowflake account. For full details, see Snowflake's documentation on consuming shared data.
-
As an Account Admin, run the following to list available shares:
SHOW SHARES;Your share appears as an
inboundtype with the naming patternCLOUDZERO_<account_id>_<organization_id>. For details on the SHOW SHARES output, see the Snowflake reference. -
Create a database from the share:
CREATE DATABASE <your_database_name> FROM SHARE <cloudzero_account>."<share_name>";Replace
<your_database_name>with a name of your choice,<cloudzero_account>with the Snowflake account locator where the share resides, and<share_name>with the share name from theSHOW SHARESoutput. The share name contains dashes and requires double quotes.
Have questions or feedback? Reach out to your account manager.
Updated about 2 months ago