Manage Roles with SSO
Automate Role assignment by enabling your single sign-on (SSO) identity provider (IdP) to assign users to CloudZero Roles. For an overview of Roles, see Users & Permissions.
After you create one or more Roles and set up your SSO integration, you can enable SSO for Roles.
When your IdP sends group claims (for example, Finance team, IT team, Product team), CloudZero matches them to existing Roles by name and syncs users to those Roles. Roles without a matching group claim are ignored.
To enable SSO for Roles, follow the steps for your IdP:
Manage Roles with Okta
To enable SSO for Roles using an Okta integration, follow these steps:
- Add a claim to the Okta Authorization Server.
- Add a claim to the CloudZero-specific application in Okta.
- Enable SSO for Roles in CloudZero.
Step 1: Add Claim to Okta Authorization Server
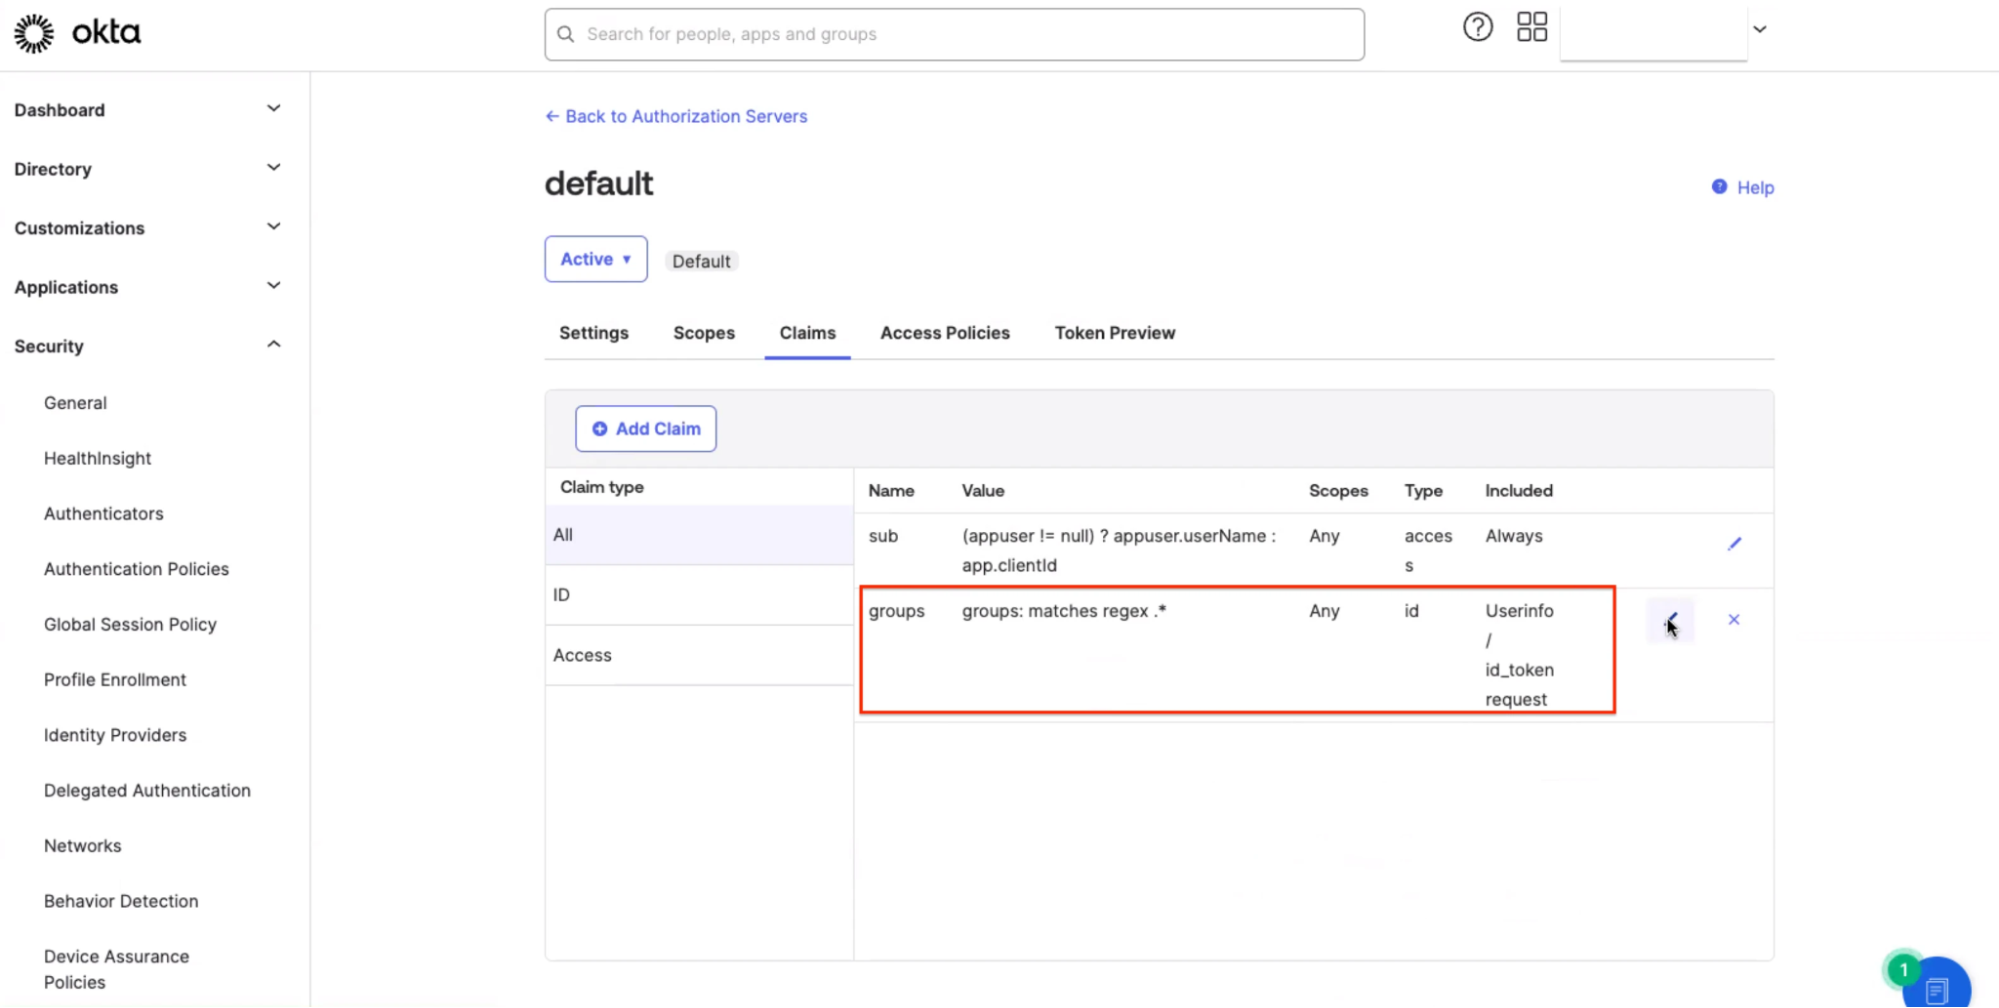
- In Okta, navigate to Security > API > Authorization > Servers and select the appropriate authorization server. This is usually the default server.
- Select Claims > Add Claim.
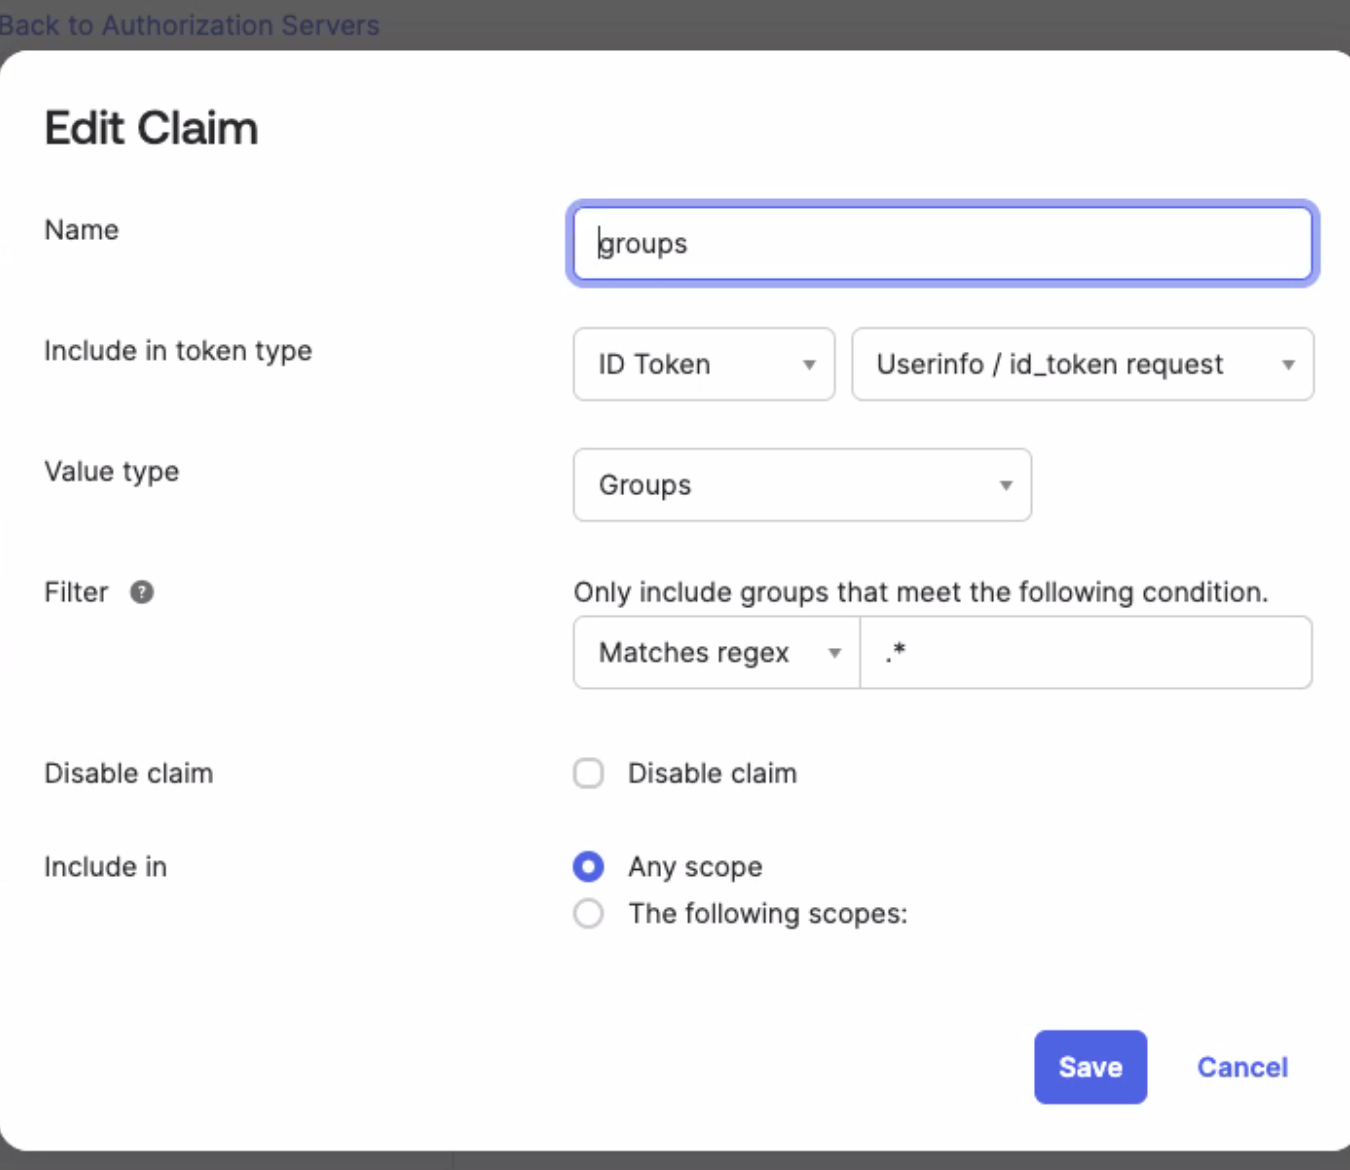
- Enter a Name for the Okta claim.
- In the Include in token type field, select ID Token, and in the second drop-down selector, choose Userinfo/id_token request.
- Set Value type to Groups.
- In the Filter field, set the filter predicate drop-down menu to your choice of predicate, for example, Matches regex.
- Set the filter value to your choice of value, for example,
.*to match all CloudZero Roles. Ensure this matches the name of the Roles your users are in. - Set the Include in field to Any scope.
- Select Save.
The claim appears in the claims table for your authorization server:
Step 2: Add Claim to CloudZero application in Okta
-
In Okta, navigate to Admin Console > Applications > Applications.
-
Select your CloudZero application.
-
On the Sign On tab, scroll down to the OpenID Connect ID Token and select Edit.
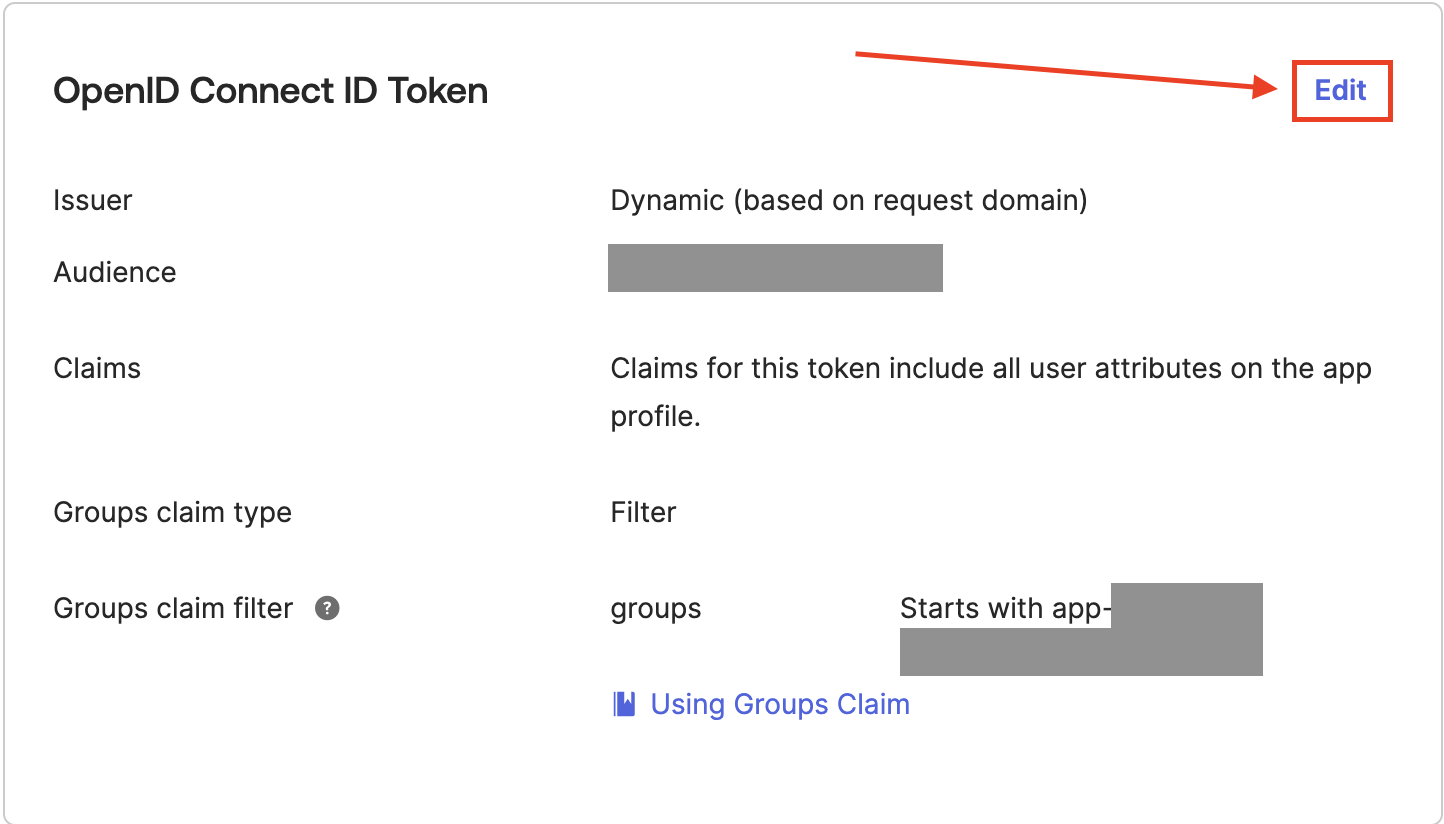
-
In the Groups claim filter section, set the first drop-down menu to groups.
-
Set the second drop-down menu to your choice of filter predicate, for example, Matches regex.
-
Set the filter value field to your choice of value, for example,
.*to match all CloudZero Roles. In this example, the filter passes all groups that start withapp-clou.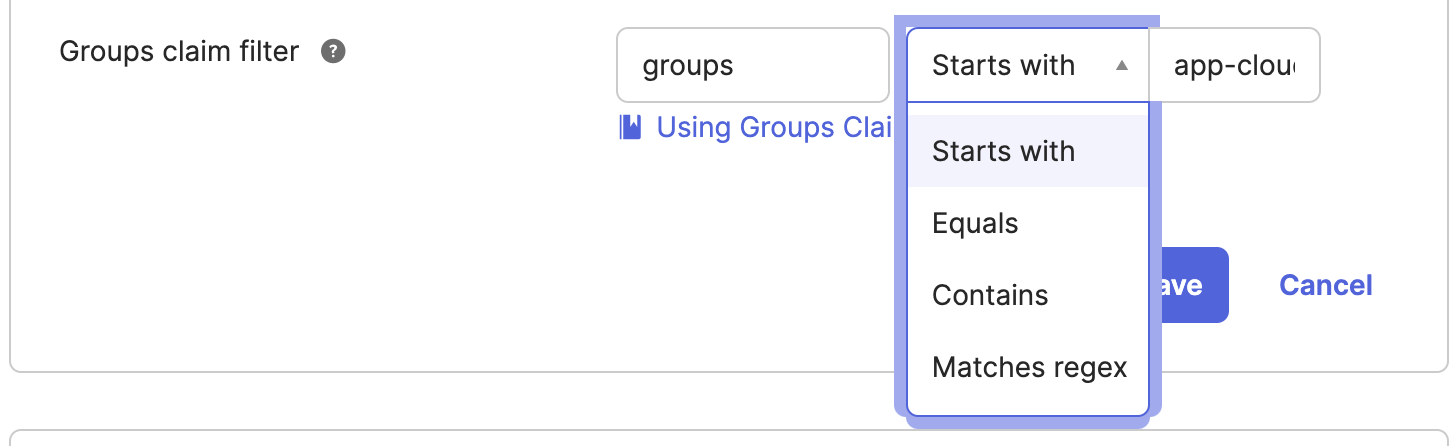
-
Select Save.
If your organization uses Active Directory (Entra ID) groups in Okta, the standard regex filter does not retrieve both AD and Okta groups. See Okta's documentation on retrieving AD and Okta groups in OIDC claims for the correct filter configuration.
Step 3: Enable SSO for Roles in CloudZero
- In CloudZero, navigate to Settings > SSO Integrations and select your Okta integration:
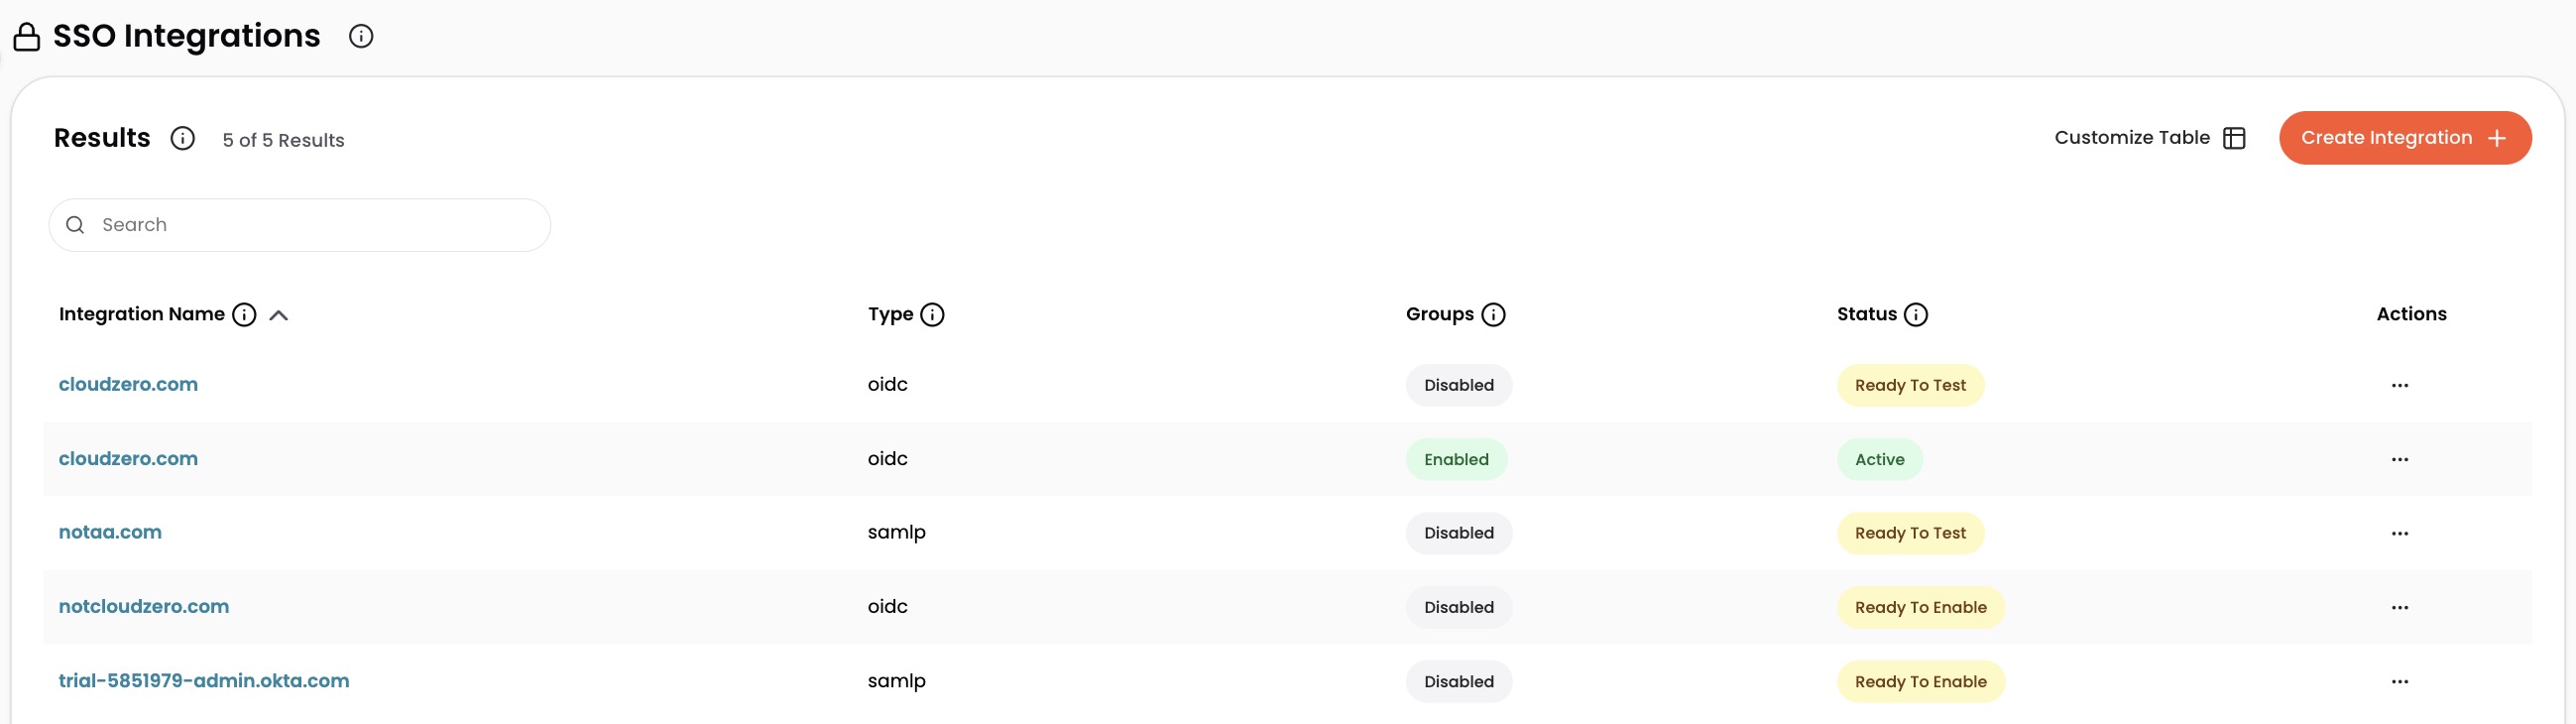
- Scroll down to the SSO Connection Status and Controls section and check the Enable SSO for Roles (called Groups in the image) box:
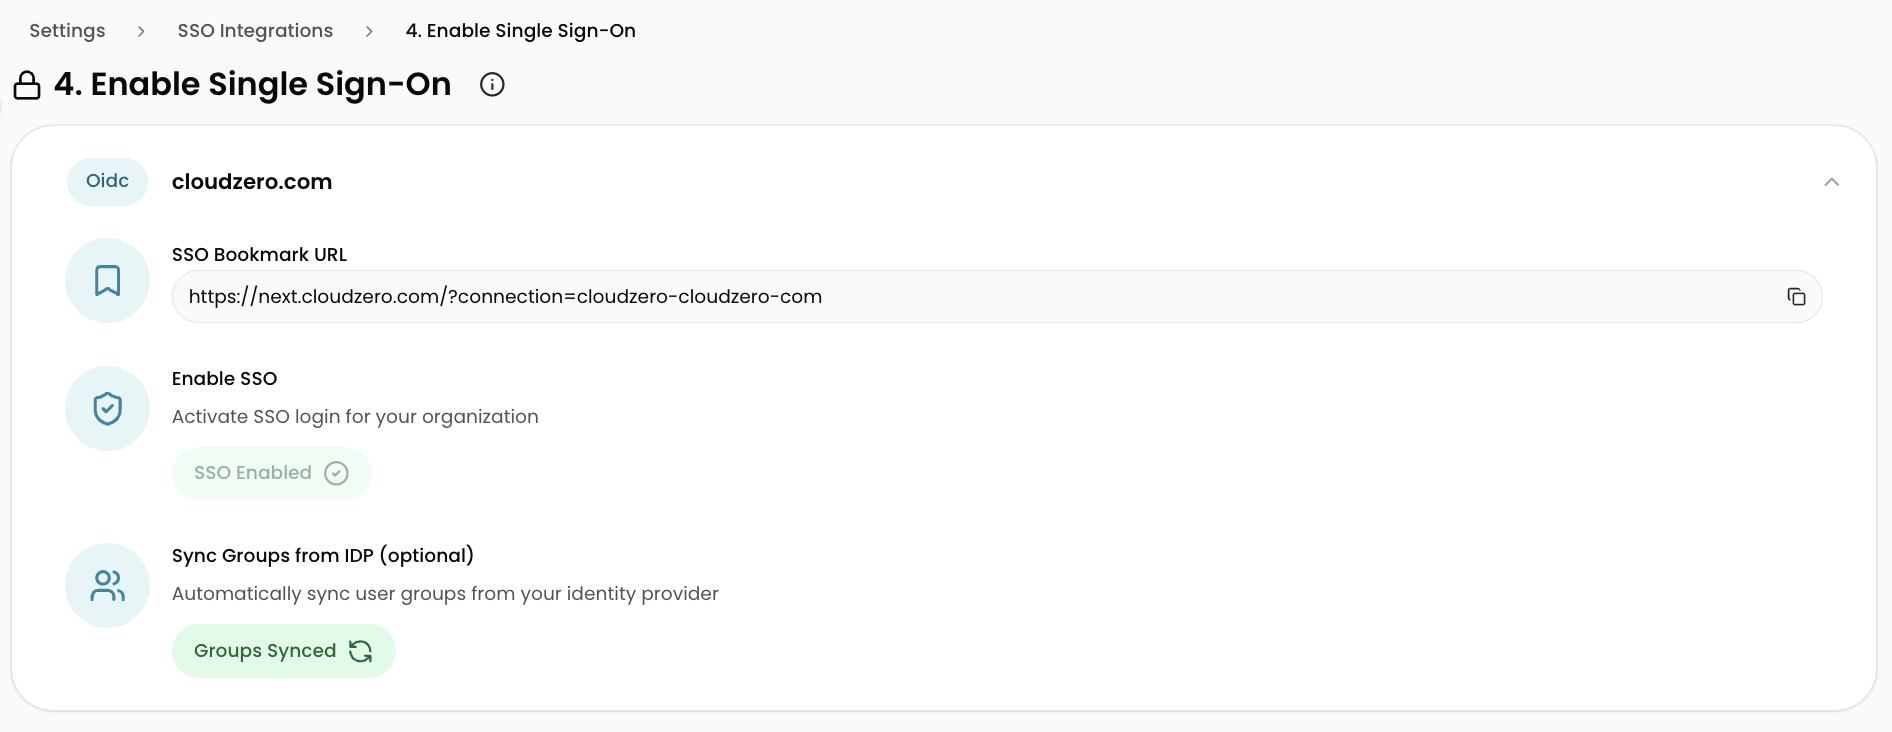
- Select Update.
Microsoft Entra ID (Azure AD)
To enable SSO for Roles using a Microsoft Entra ID (Azure Active Directory) integration:
- In CloudZero, navigate to Settings > SSO Integrations and select your Microsoft Entra ID (Azure AD) integration.
- Scroll down to the SSO Connection Status and Controls section and check the Enable SSO for Roles box.
- Select Update.
OpenID Connect including GCP
Your OIDC identity provider needs to send CloudZero the list of groups each user belongs to. This is typically done by adding a groups claim to the ID token. Refer to your IdP's documentation for how to configure claims.
After configuring your IdP, enable SSO for Roles in CloudZero:
- In CloudZero, navigate to Settings > SSO Integrations and select your OIDC integration.
- Scroll down to the SSO Connection Status and Controls section and check the Enable SSO for Roles box.
- Select Update.
Have questions or feedback? Reach out to your account manager.
Updated about 2 months ago