Manage Multiple Organizations
Organization Management lets you provision and manage multiple CloudZero organizations from one centralized location. A Primary Organization (typically an MSP or controlling entity) creates an Organization Group and adds Tenant Organizations to it. Each Tenant Organization is a separate CloudZero account managed by the Primary Organization.
Contact your account manager to enable Organization Management.
| Action | Description |
|---|---|
| Create Organization Group | Set up your Organization Group |
| Add an existing organization | Invite an organization already in CloudZero |
| Create a new Tenant Organization | Create a new CloudZero account as a tenant |
| Switch to a different Tenant Organization | Navigate between your tenants |
| Manage user access | Control which users can access each tenant |
| Disable a Tenant Organization | Pause billing, ingestion, and user access |
| Remove a Tenant Organization | Remove a tenant from your Organization Group |
| Delete an Organization Group | Delete the Organization Group entirely |
Create Organization Group
Create an Organization Group to start managing Tenant Organizations.
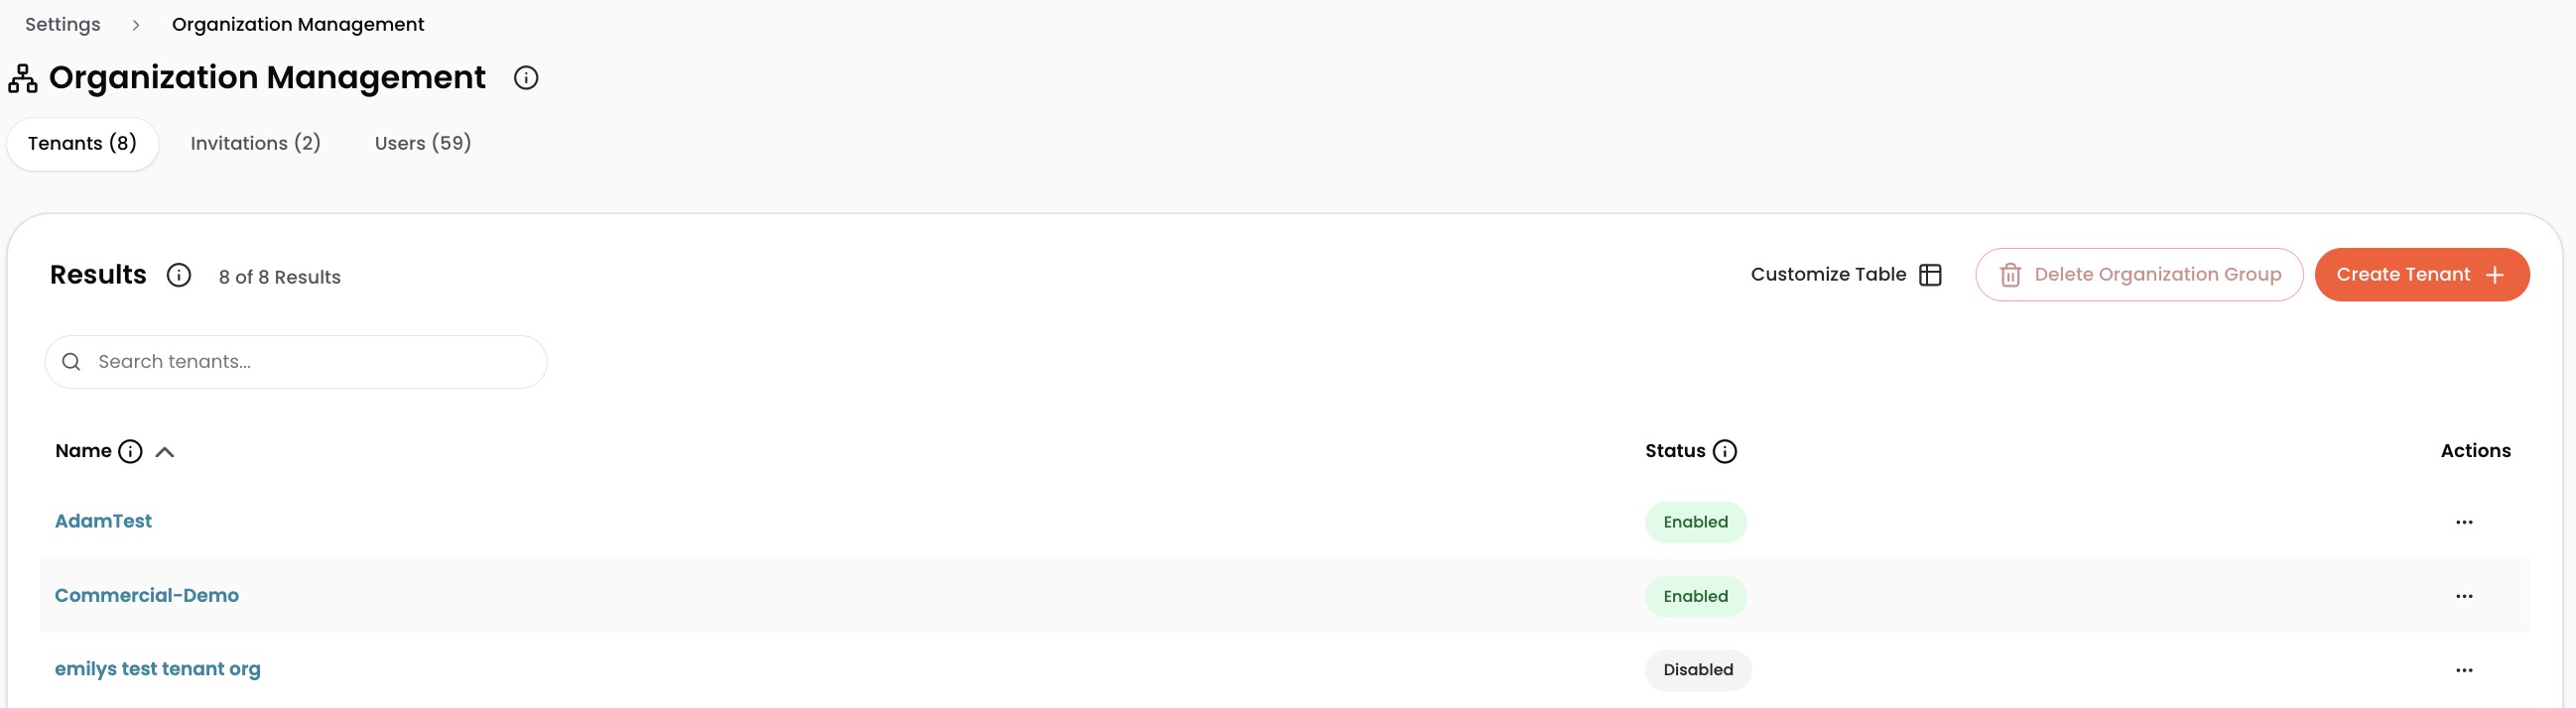
- Navigate to Settings > Organization Management.
- Select Create Organization Group.
- Select Create to confirm.
Add an existing organization
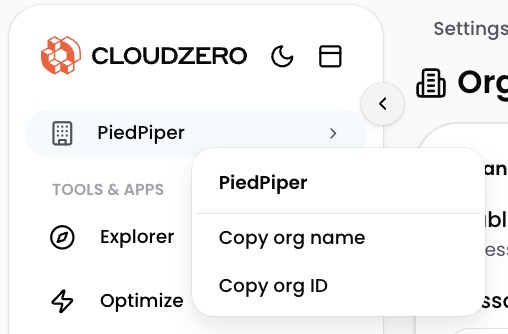
Add an organization that already exists in CloudZero to your Organization Group by inviting it. You need the organization's Organization ID, which the tenant admin can find on the right side panel by right-clicking the Tenant name and selecting Copy org ID.
- Navigate to Settings > Organization Management, select the Invitations tab, and select Invite Tenant.
- Paste the Organization ID and select Invite Tenant.
The Tenant Organization appears on the Invitations tab until the tenant admin accepts. After acceptance, it moves to the Tenants tab.
Create a new Tenant Organization
Create a Tenant Organization for a customer or account that does not yet exist in CloudZero.
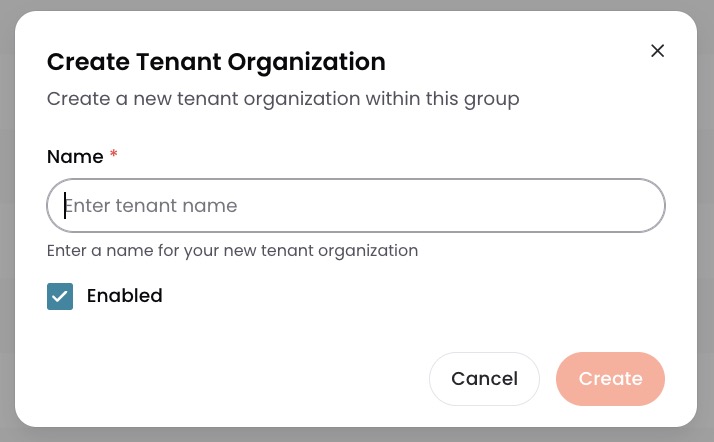
- Navigate to Settings > Organization Management and select Create Tenant Organization in the Tenants tab.
- Enter a name for the Tenant Organization.
- Select Is Enabled to begin ingesting cost data immediately.
- Select Create.
Organizations can be configured as invite-only to require users to be invited before they can register. To enable this setting, navigate to Settings > Organization Settings.
Switch to a different Tenant Organization
Primary Organization users can switch between Tenant Organizations using the tenant switcher in the upper left corner. Each user sees only the Tenant Organizations they have access to.
Tenant Organization users log directly into their own organization and cannot access other tenants or the Primary Organization.
Manage user access to Tenant Organizations
Control which Primary Organization users can access each Tenant Organization.
- Navigate to Settings > Organization Management and select the Tenant Organization.
- Select Manage Access.
- Select the users who need access to this Tenant Organization.
- Select Apply.
Disable a Tenant Organization
Disabling a Tenant Organization pauses billing and ingestion and prevents its users from logging in. You can re-enable it at any time.
- Navigate to Settings > Organization Management and select the Tenant Organization.
- Toggle the Organization status to disabled.
Remove a Tenant Organization
Remove a Tenant Organization from your Organization Group. You must remove all user access before the Remove Tenant button becomes available.
- Navigate to Settings > Organization Management and select the Tenant Organization.
- Select Remove Tenant.
- Type the tenant name to confirm and select Remove.
Delete an Organization Group
Delete your Organization Group when you no longer need to manage Tenant Organizations. You must remove all Tenant Organizations first.
- Navigate to Settings > Organization Management.
- Select Delete Organization Group.
- Select Delete to confirm.
Have questions or feedback? Reach out to your account manager.