Allocate Visually with Dimension Studio
Dimension Studio is CloudZero's visual editor for creating and managing Dimensions. You can build rules, configure conditions, and publish Dimensions directly in the browser with no code required. For a conceptual walkthrough of planning and building Dimensions, see How to Build a Dimension.
Permissions: To create or edit Dimensions, you must have a role with the Modify Dimension Definitions permission.
Your first Dimension
This walkthrough creates an Environment Dimension that categorizes your costs into Production and Development.
What you need: At least one connected provider with cost data flowing into CloudZero.
- In CloudZero, select Dimension Studio from the left navigation.
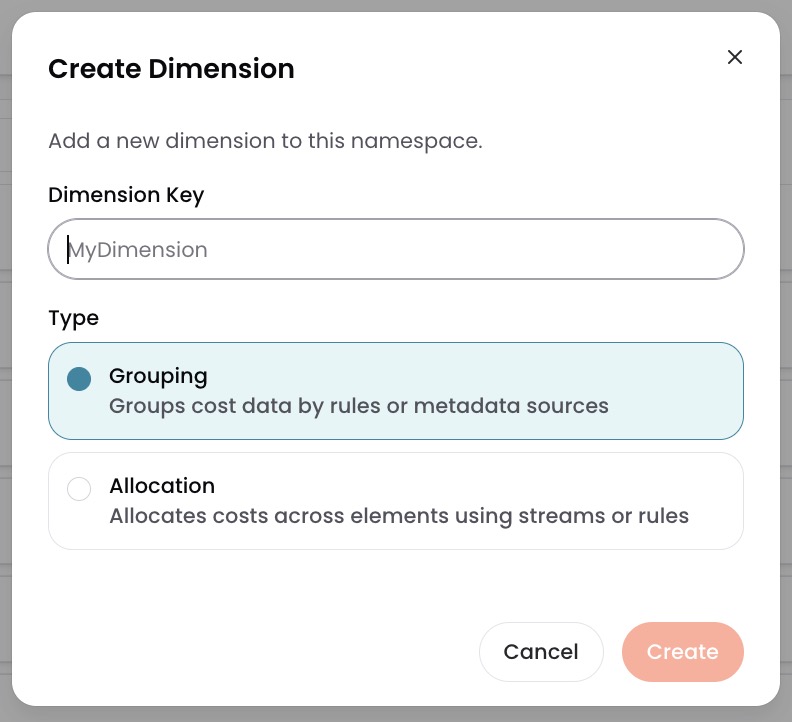
- Select + New Dimension. Enter
Environmentas the Dimension Key (this identifies your Dimension and becomes its default display name), select Grouping, and select Create.
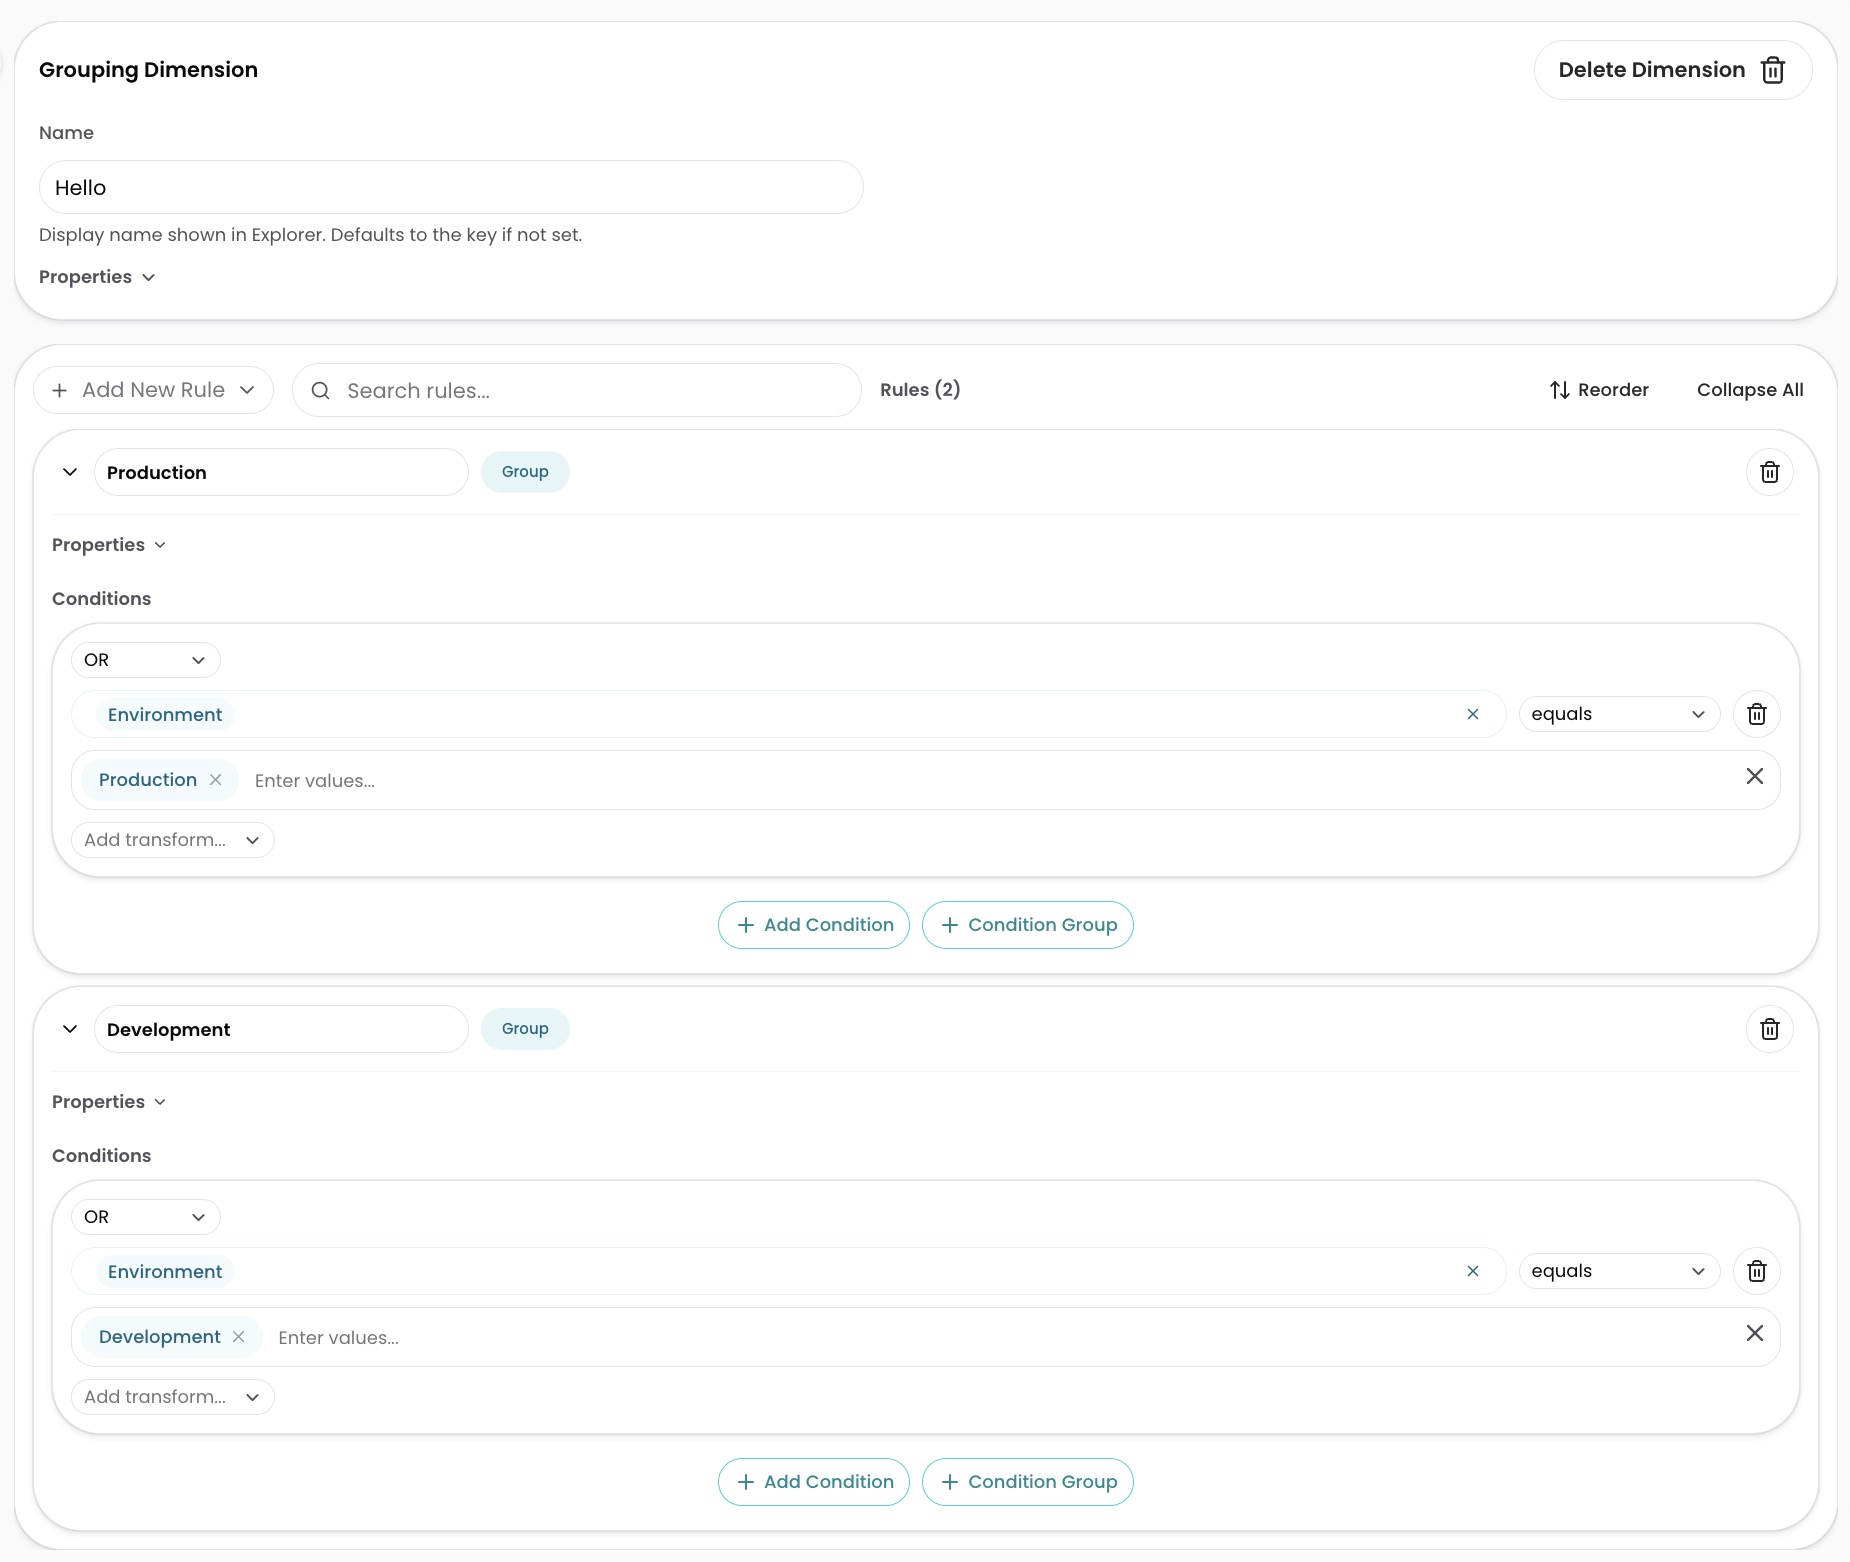
- Select + Add Rule and select Group.
- Replace "New Rule" with
Production. - Select + Add Condition. Click the source dropdown, expand Tags, and select your environment tags (for example,
EnvandEnvironment). - Leave the operator as equals.
- Select Enter values and select the production values from the list (for example,
Prod,PROD). You can also type a value and press Enter to add values not yet in your data. - Select + Add Rule again and select Group. Name it
Development. Add a condition with the same sources and select the development values. - Select Publish.
Your Environment Dimension begins processing and is usable within a few minutes. Costs matching your rules are grouped under Production or Development. Costs that do not match any rule appear under Not In Dimension. Changes are retroactive, applied across your full cost history.
Create a Dimension
Dimension Studio supports two types of Dimensions:
| Type | What it does | When to use | Guide |
|---|---|---|---|
| Grouping | Categorize and label costs using metadata and conditions | Most Dimensions. Organize by environment, team, product, or any attribute. | Create a Grouping Dimension |
| Allocation | Split shared costs across elements by proportion or usage telemetry | Shared infrastructure that serves multiple teams or products. | Create an Allocation Dimension |
Edit a Dimension
- In Dimension Studio, select the Dimension from the right sidebar.
- Make changes in the Form Editor tab.
- Select Publish.
Delete a Dimension
Deleting a Dimension can affect other Dimensions, Dashboards, Views, and other areas of the platform that reference it. For example, if
Featureis the child ofProduct, deletingFeaturerequires updating theProductDimension. You can use the History tab to review and restore previous versions of your definitions.
- In Dimension Studio, select the Dimension from the right sidebar.
- Select Delete Dimension.
- Select Publish.
Publishing and version history
Changes you make in Dimension Studio are not applied until you select Publish. To undo unpublished changes, select Discard.
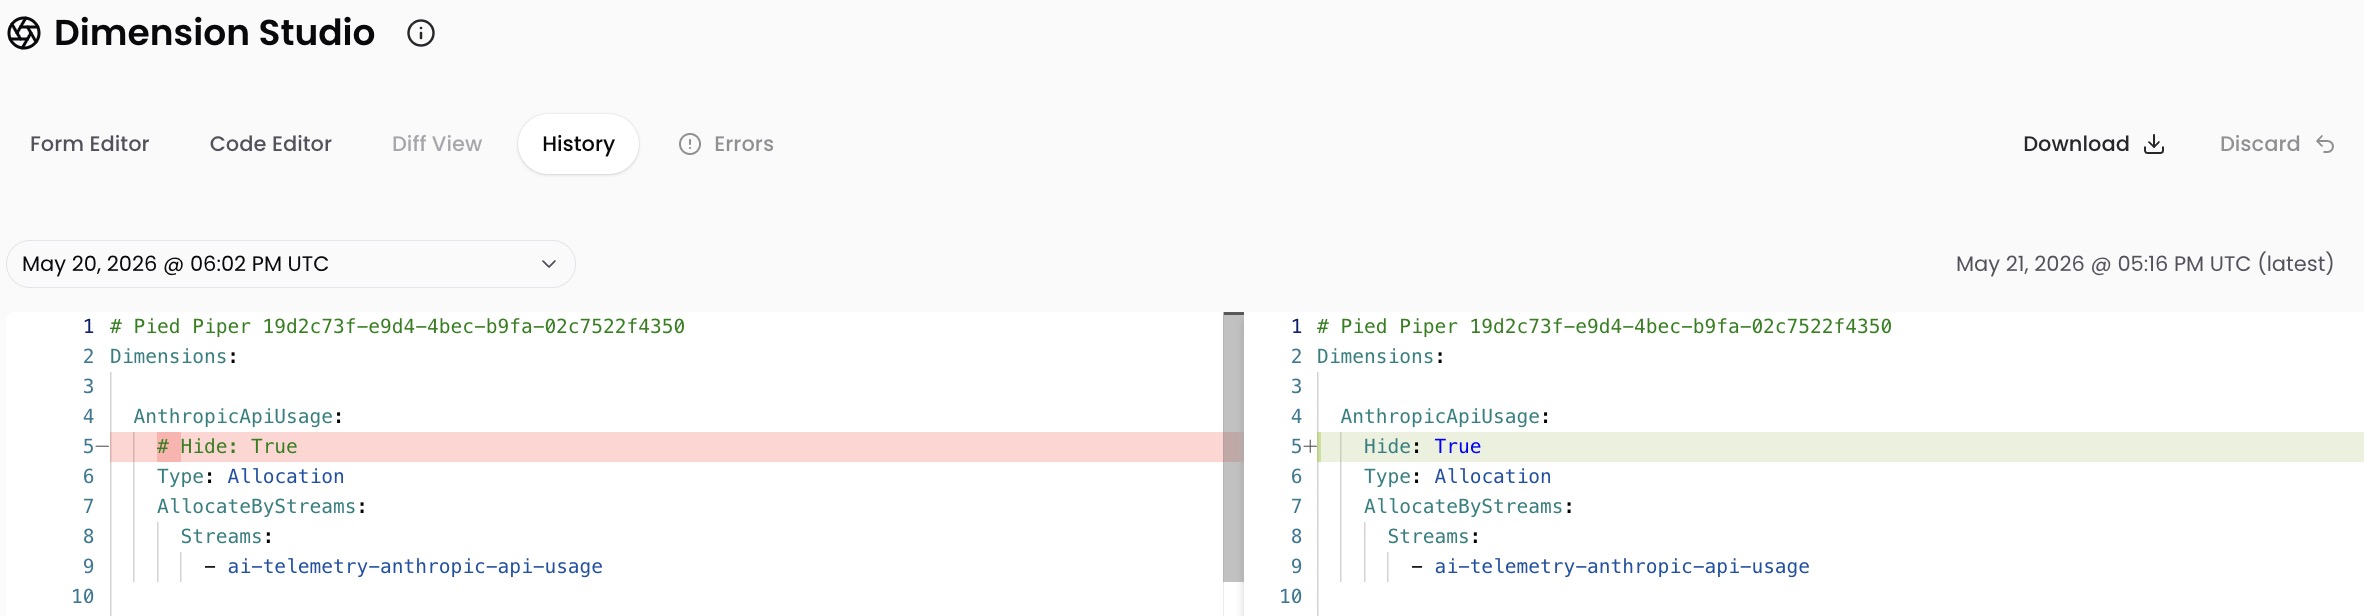
Each time you publish, CloudZero saves a snapshot. The History tab shows all previous versions, and you can restore any of them if needed.
To restore a previous version:
- Click the History tab.
- Select the version you want to restore.
- Select Publish to make it active.
To compare your current changes against the published version, click the Diff View tab.
Code Editor
Most Dimensions can be built entirely in the Form Editor. The Code Editor tab is available for writing CostFormation YAML directly, working with AI to generate and edit Dimensions, or other advanced use cases. Changes made in the Code Editor and the Form Editor synchronize automatically.
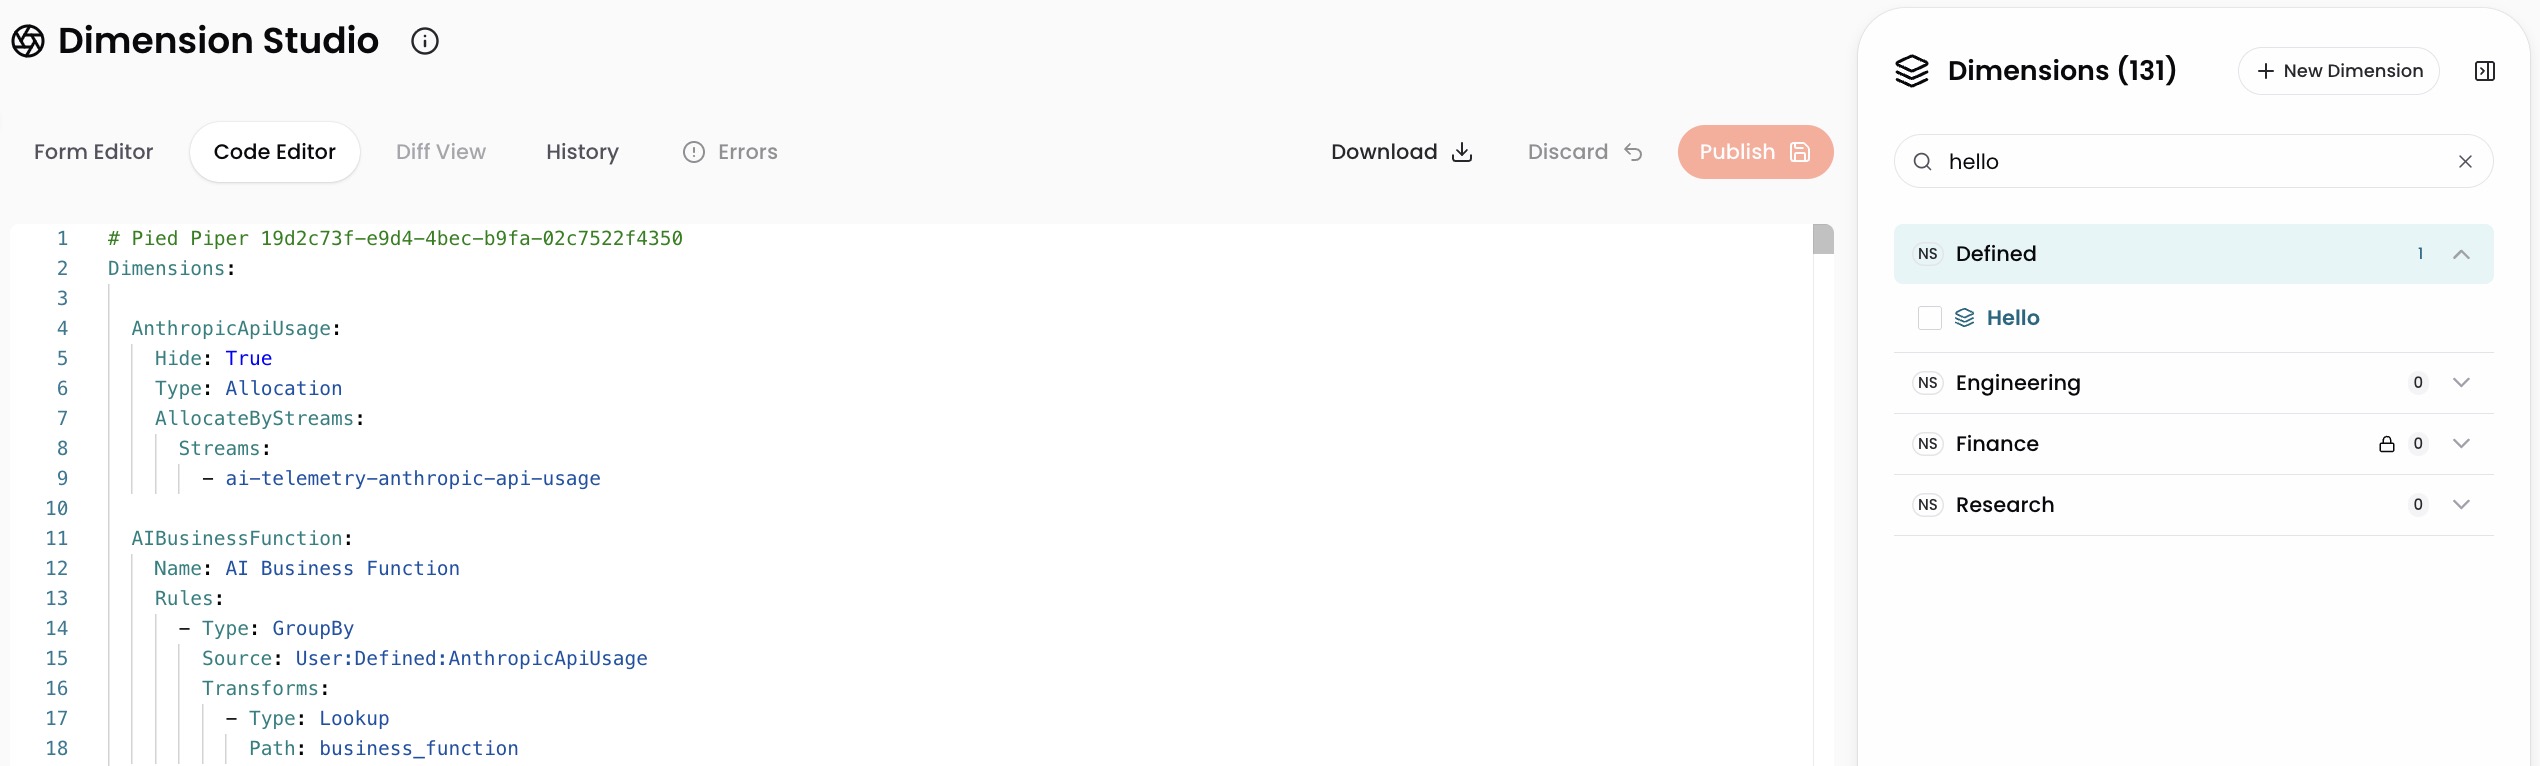
To edit a single Dimension in YAML:
- Select a Dimension from the right sidebar.
- Click the Code Editor tab.
- Edit the YAML definition.
- Select Publish.
To export all Dimension definitions as a single YAML file, select Download.
For details on CostFormation YAML syntax, see Allocate through YAML with CostFormation.
Troubleshooting
When you publish, CloudZero validates your changes. The Errors tab shows any issues that must be resolved before publishing.
Common issues:
- Version conflict: Another user published changes while you were editing. Select Discard to reload the latest version, then reapply your changes.
- Syntax errors: The Code Editor highlights formatting or syntax issues. Resolve each error before publishing.
For details on managing Dimensions across teams with independent version history and access control, see Namespaces.
Have questions or feedback? Reach out to your account manager.
Updated about 1 month ago