Connecting to LiteLLM
The LiteLLM Connector is currently in open beta. Contact your FinOps Account Manager to share feedback or request help.
How the LiteLLM Connection works
CloudZero's LiteLLM connection allows you to export large language model (LLM) usage data from LiteLLM to CloudZero for cost tracking analysis.
After you create a connection in CloudZero and configure it in LiteLLM, you can stream LLM token, latency, and cost data into CloudZero, where you can view, track, and forecast LLM costs broken down by model, team, user, and more.
Following the next data ingestion, you will see your LiteLLM costs and usage throughout the CloudZero platform, including in the Explorer and Analytics.
Prerequisites for the LiteLLM Connection
Before you can connect CloudZero to your LiteLLM proxy, you must have the following:
- In CloudZero: A role with permission to create a cloud integration.
- In LiteLLM:
- An operational LiteLLM proxy deployment.
- Administrative access to configure LiteLLM.
- Ability to add environment variables or update LiteLLM configuration files.
- Network access allowing LiteLLM to send usage data to CloudZero.
- Ability to restart or reload your LiteLLM service.
Unlike other CloudZero integrations that require you to enter a provider API key into CloudZero, this is a Provider-Linked Connection. You must first create a LiteLLM connection inside CloudZero, then generate a Connection API Key and configure it inside your LiteLLM proxy.
To connect CloudZero to LiteLLM, complete the following steps:
- Create a LiteLLM connection inside CloudZero.
- Generate a Connection API key.
- Configure the connection in LiteLLM.
Step 1: Create LiteLLM Connection
-
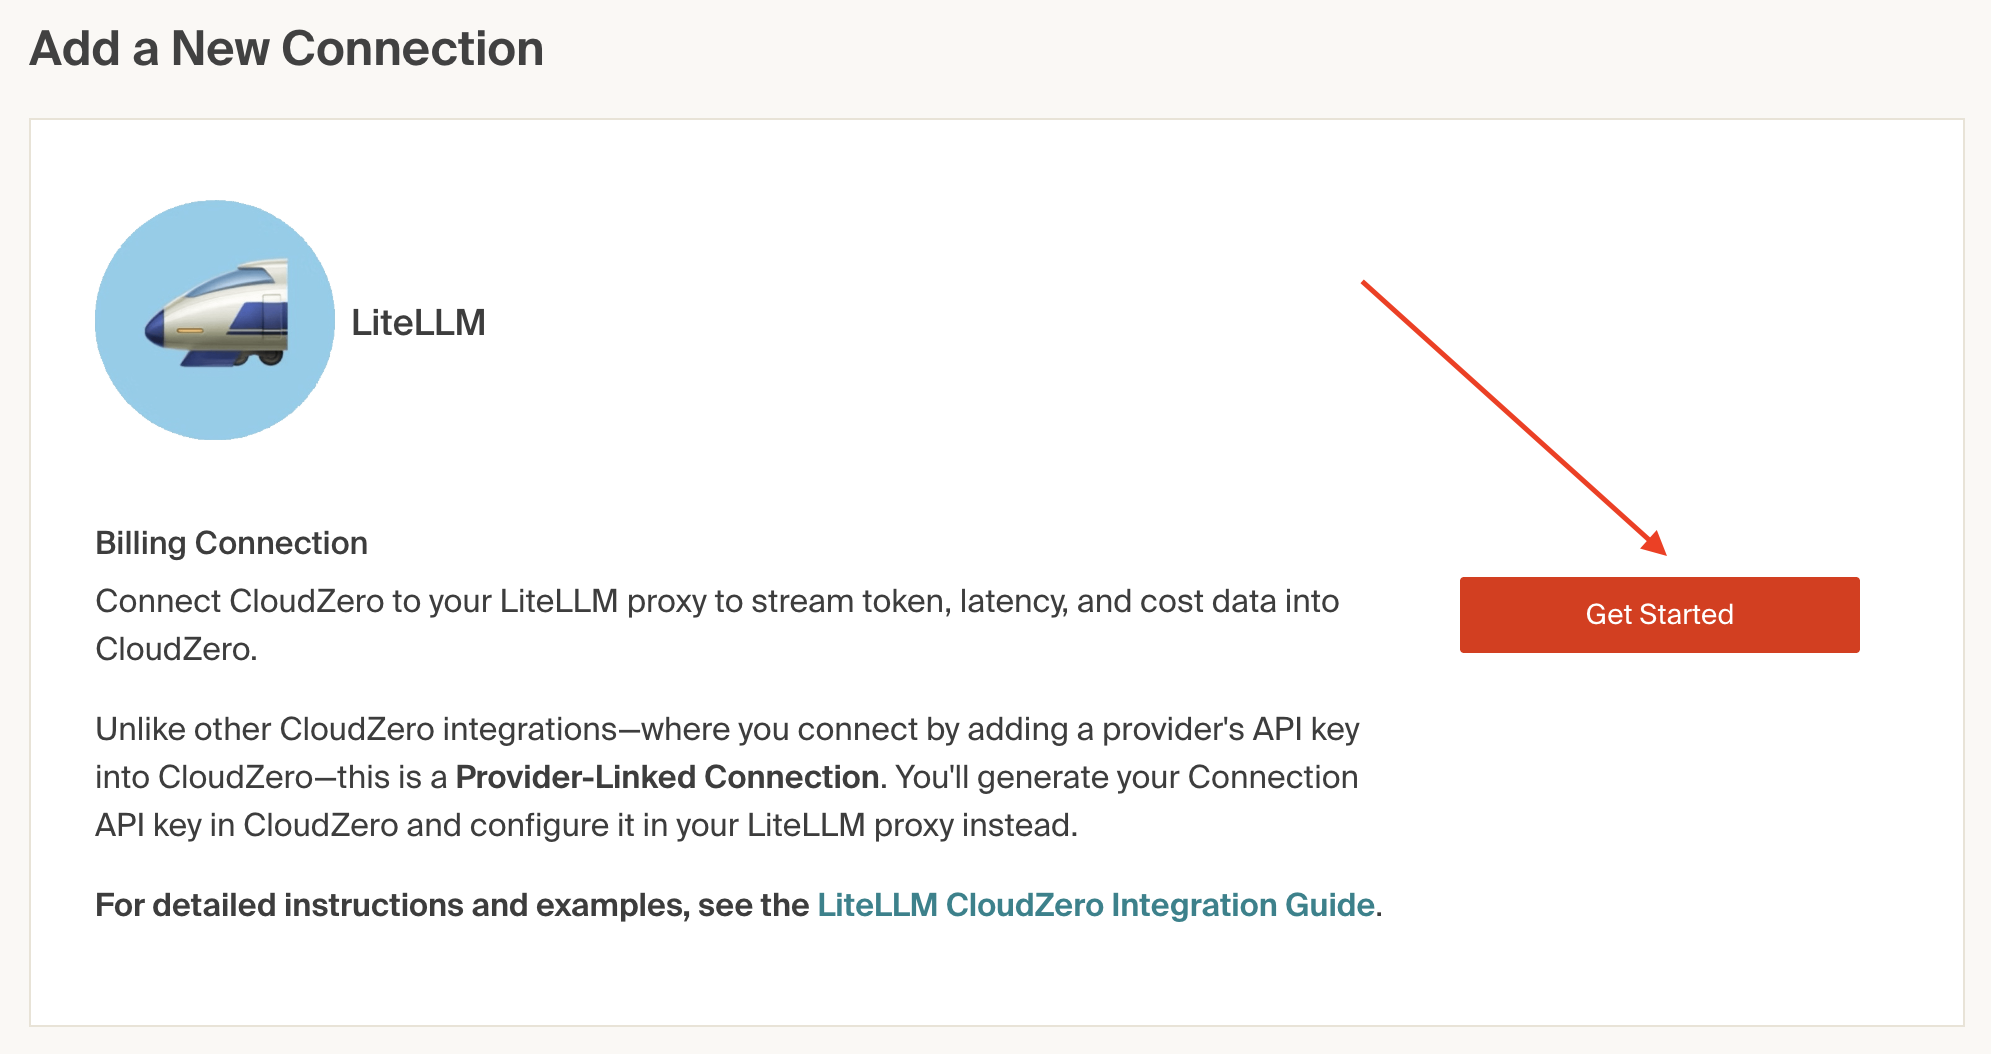
In CloudZero, navigate to Cloud Integrations and select Add Connection.
-
Select the LiteLLM tile and select Get Started:
-
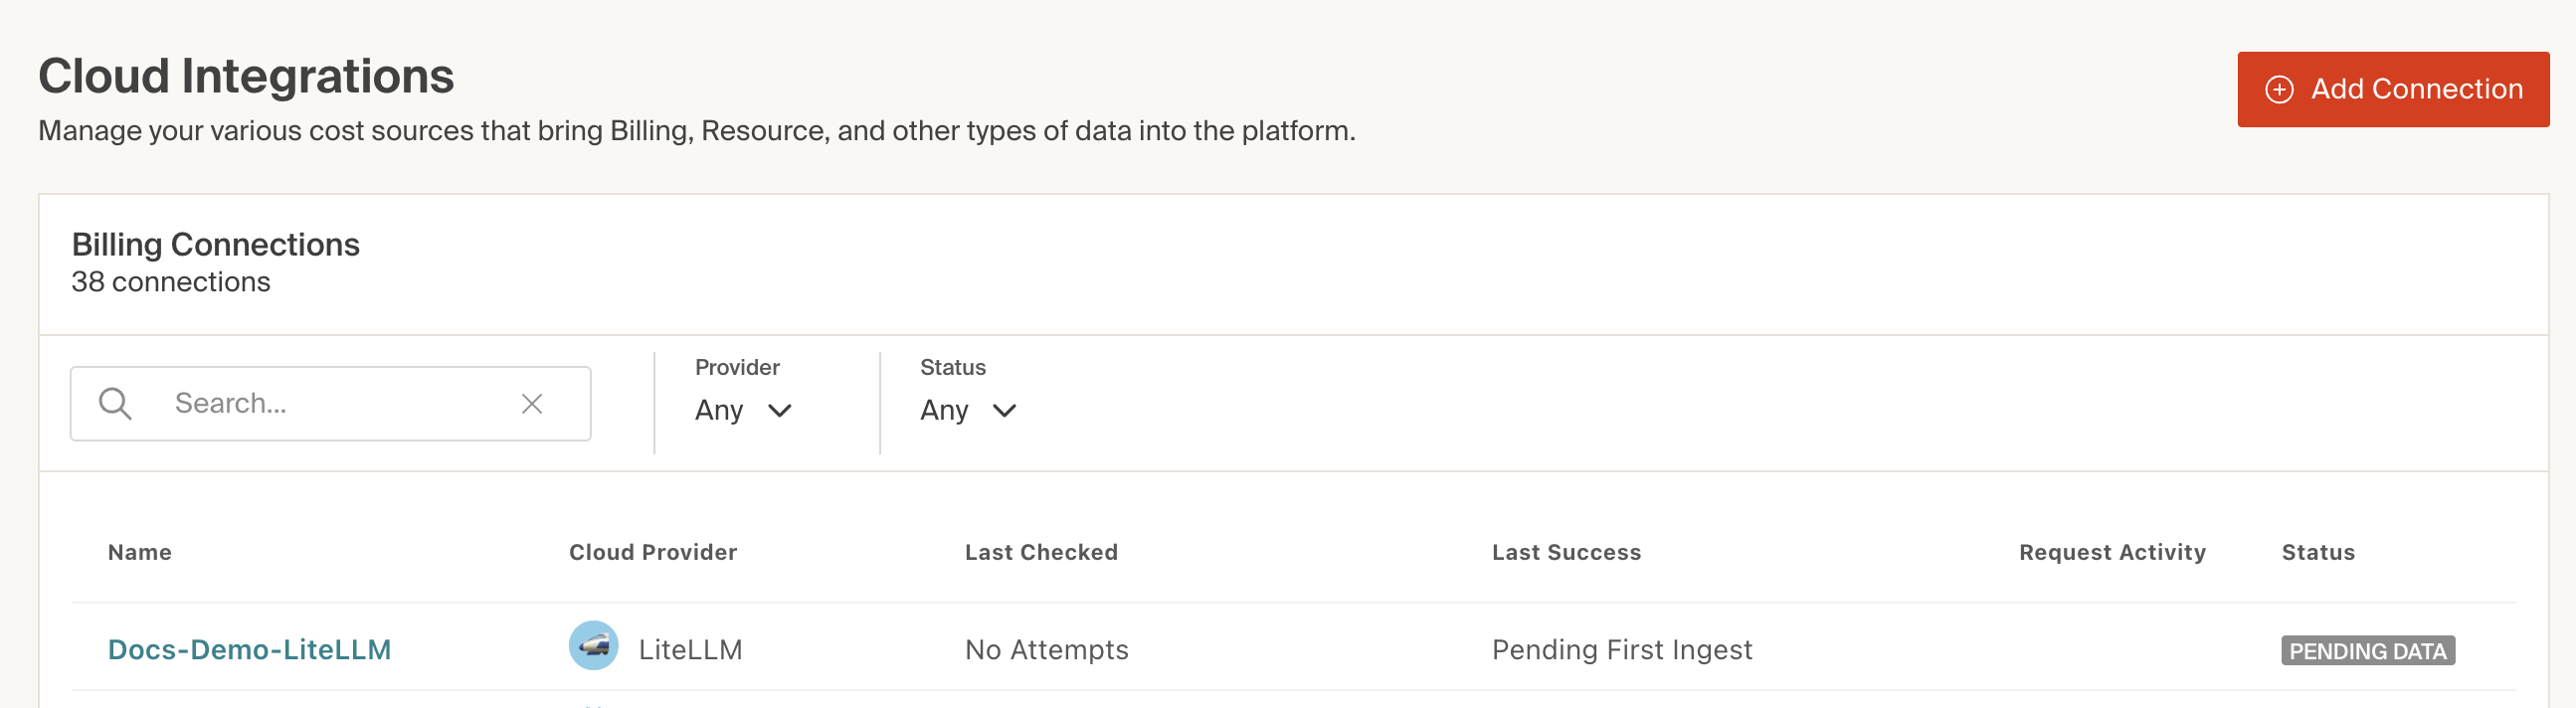
Enter a connection name and select Save.
Upon success, you will be redirected to Cloud Integrations, where your newly created LiteLLM Connection will be listed:
Next, you must generate a Connection API Key, which is required for LiteLLM to send usage data to CloudZero.
Step 2: Generate a Connection API Key
-
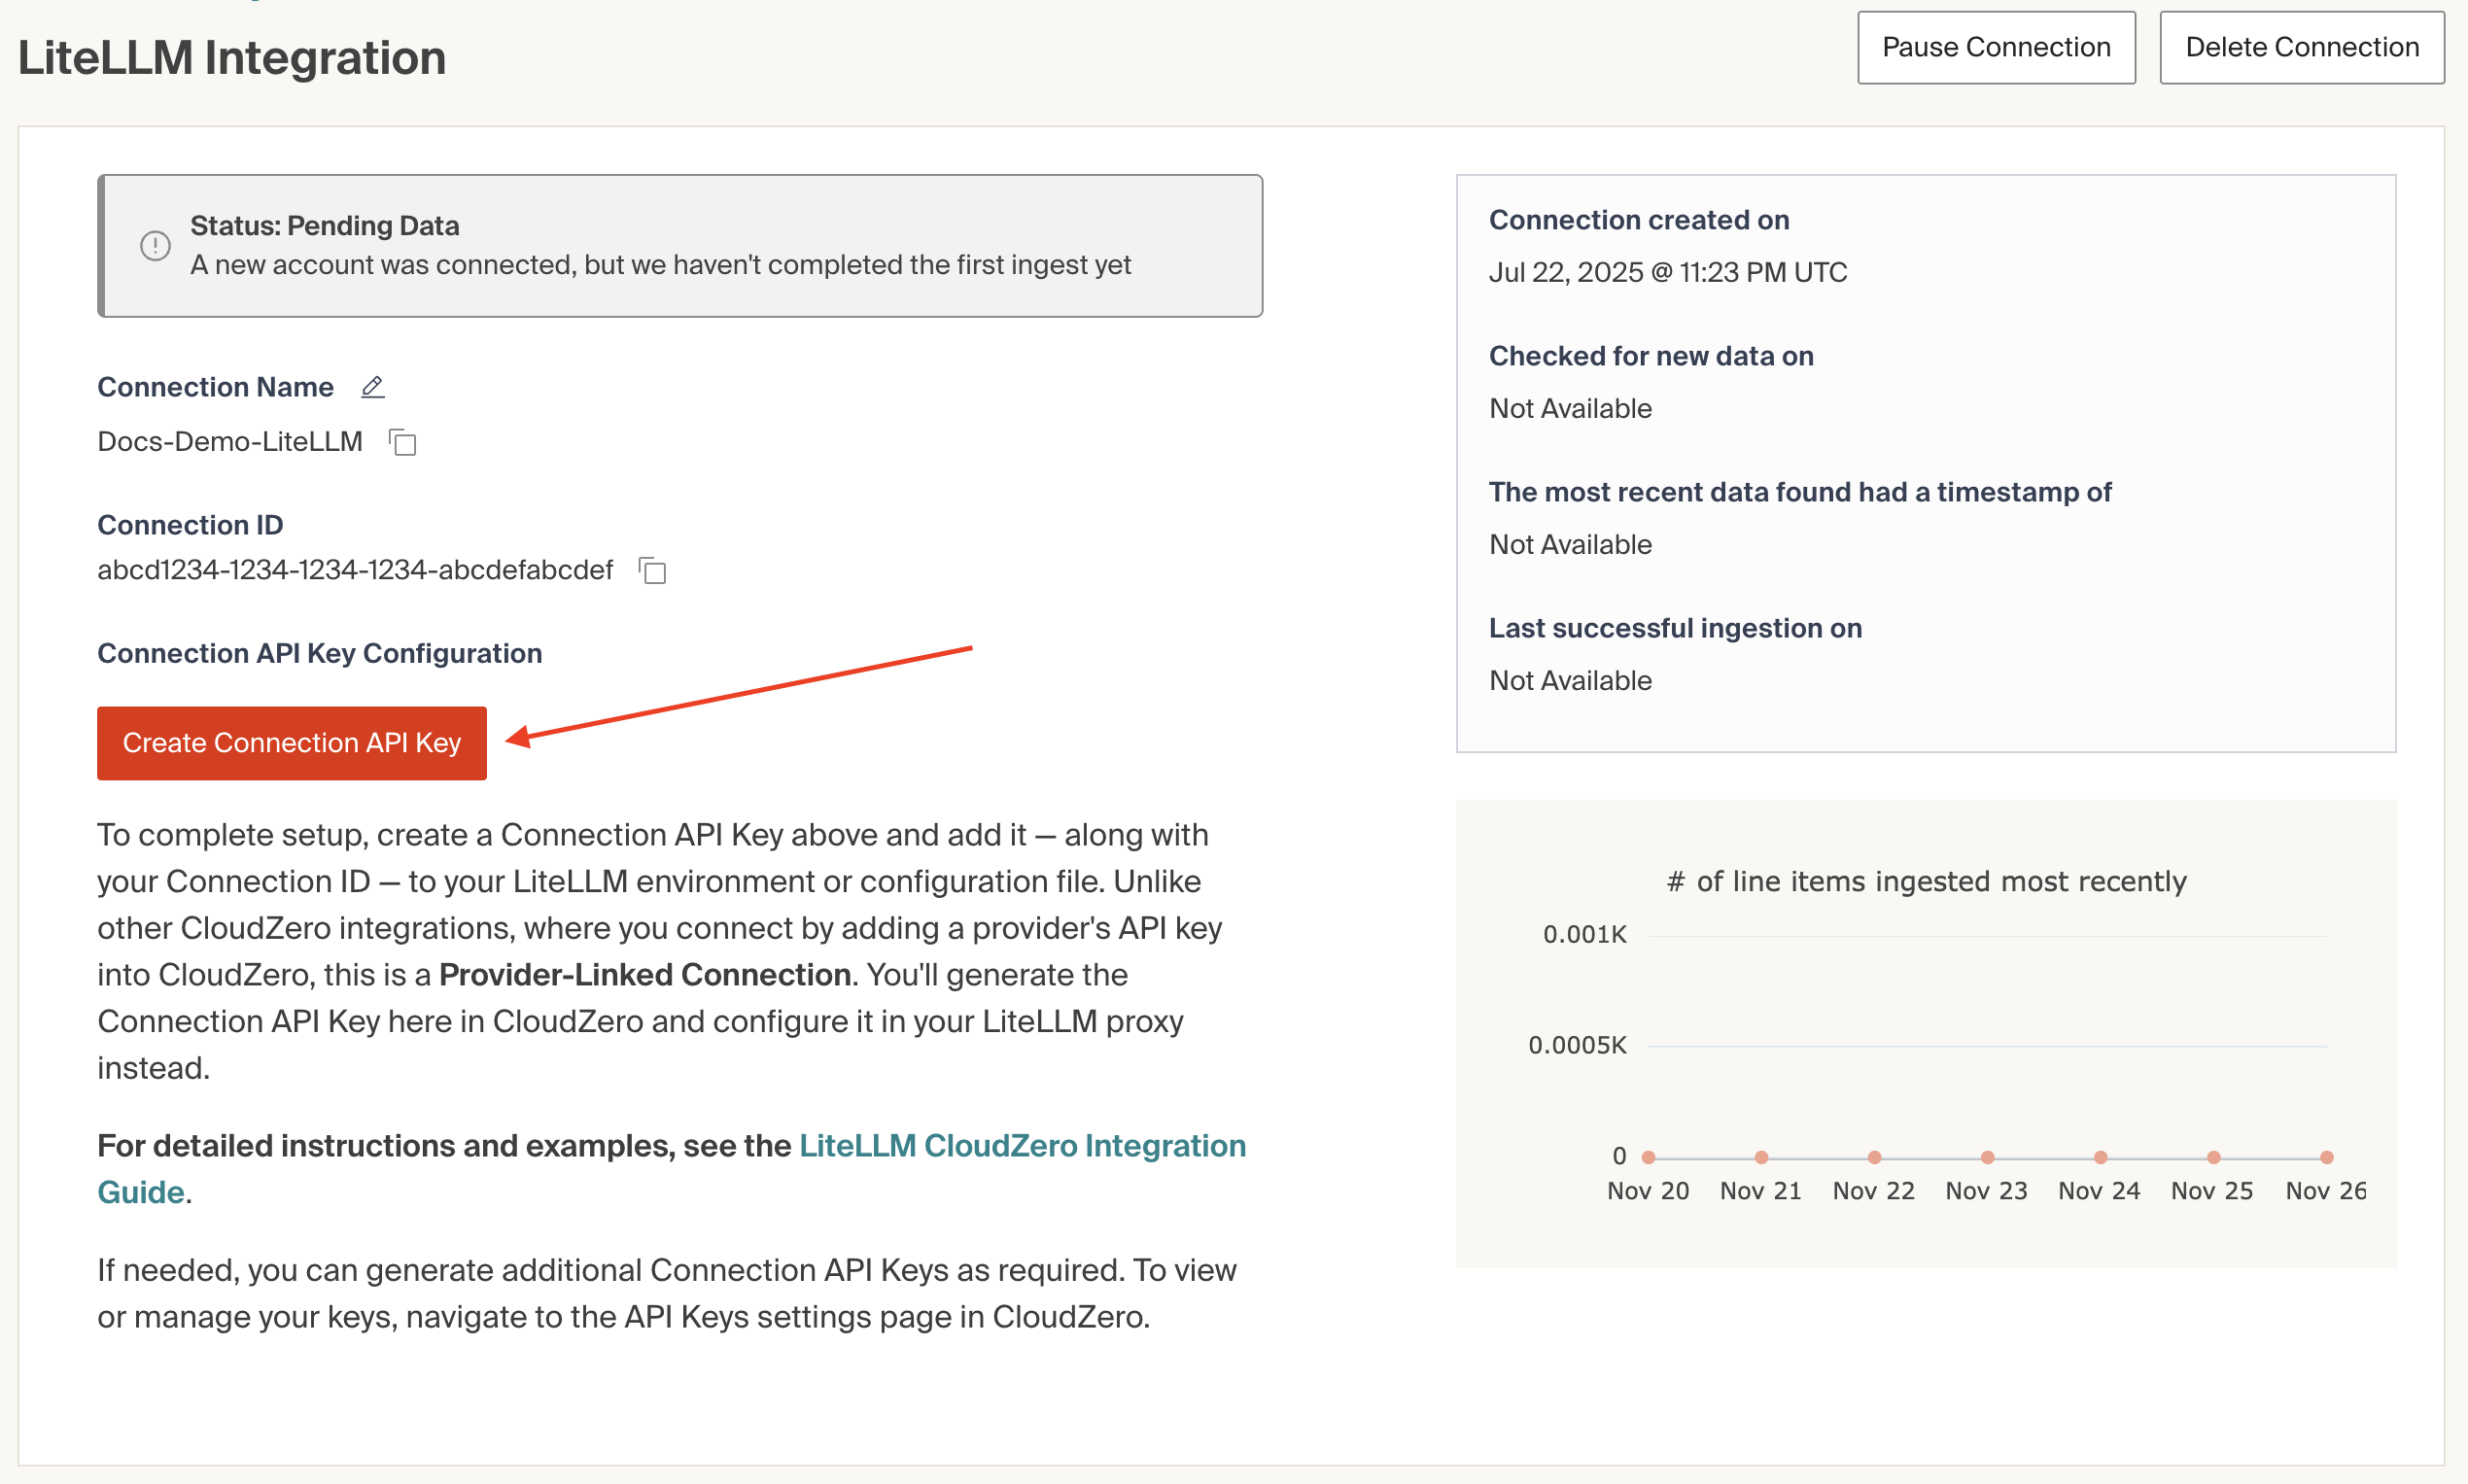
On the Cloud Integrations page, click the LiteLLM connection you just created to open its configuration screen.
-
Select Create Connection API Key.
-
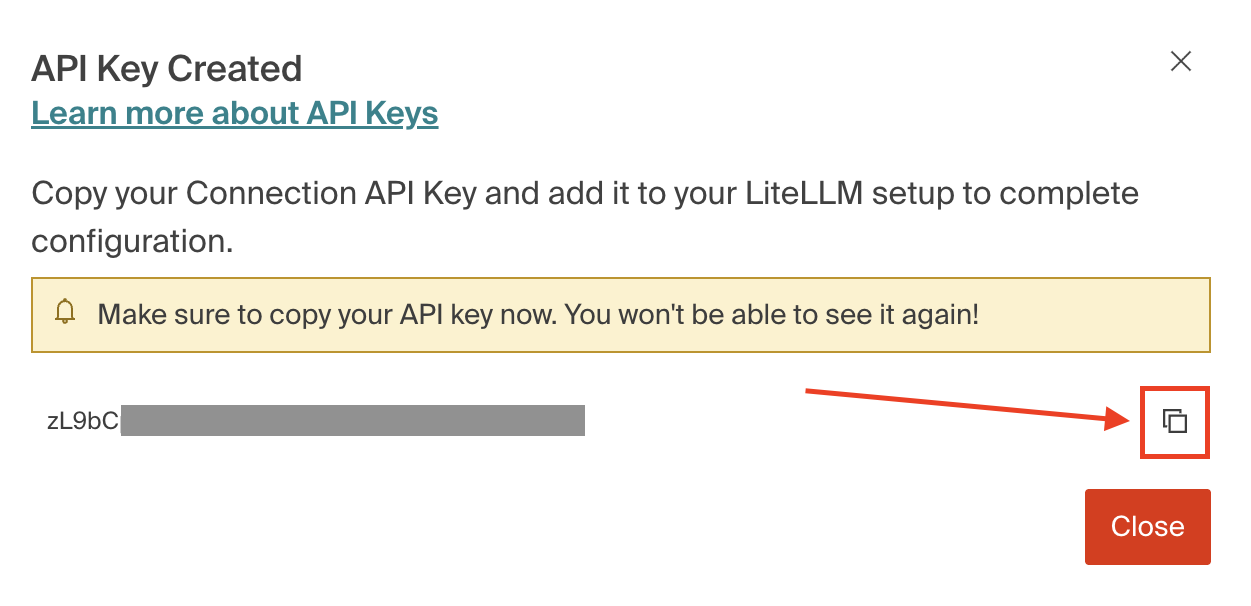
Enter a name for your Connection API Key and optionally add a description, then select Create Connection API Key.
-
CloudZero displays your new Connection API Key. Copy your Connection API Key now. You will not be able to view it again.
Next, you must add this key to your LiteLLM configuration.
Step 3: Configure LiteLLM Proxy
After generating your Connection API Key, you must configure your LiteLLM proxy to send data to CloudZero.
For detailed configuration instructions and examples, see the official LiteLLM guide: LiteLLM CloudZero Integration Guide
View the LiteLLM Connection in CloudZero
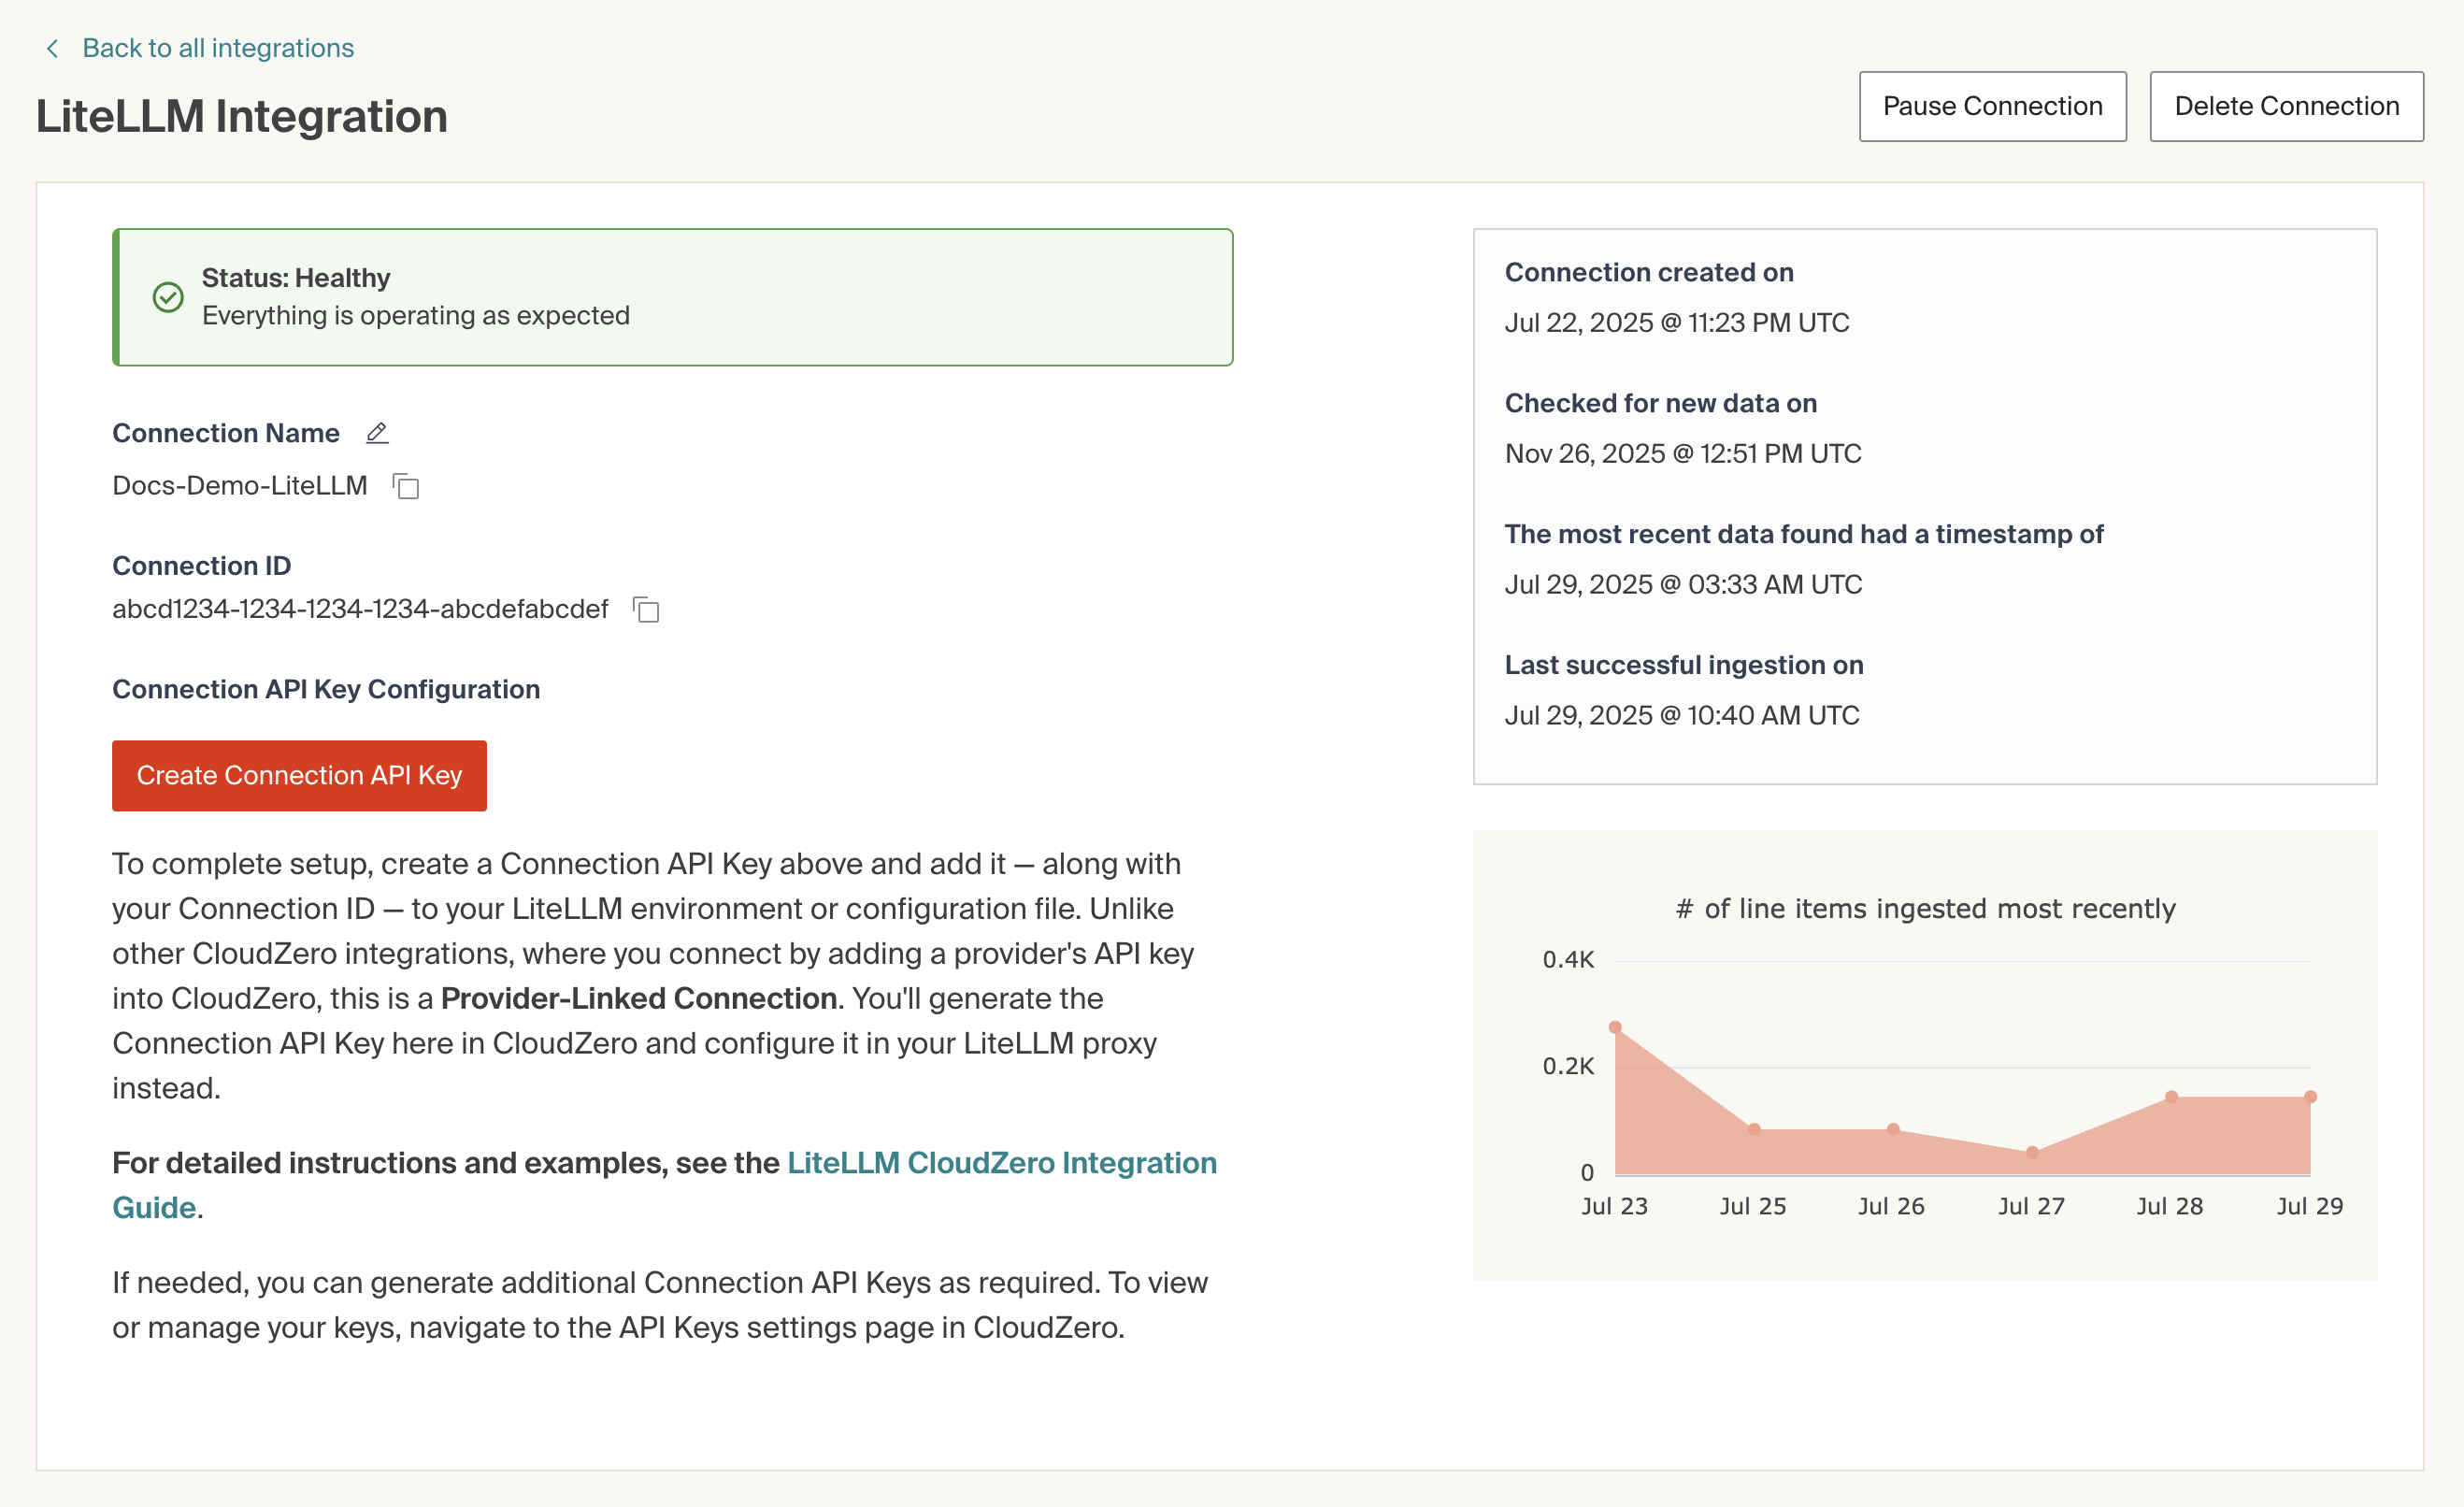
After you've successfully configured the LiteLLM proxy to send data to CloudZero, the LiteLLM Connection details page displays the following information:
- Status
- Connection Name
- Connection ID
- Timestamps for connection creation, ingestion, and more
- Number of most recently ingested line items
Note that the Status will change from Pending Data to Healthy after CloudZero has processed the first ingest of billing and/or usage data.
Managing API Keys
You can generate additional Connection API Keys if needed. To view or manage previously generated keys in CloudZero, navigate to Settings > API Keys.
To learn more about API keys in CloudZero, see API Key Scopes.
Updated about 5 hours ago