Connecting to MongoDB (Deprecated)
The CloudZero MongoDB Adaptor
The CloudZero MongoDB adaptor is containerized software that can be run from any container hosting platform. The adaptor will pull your MongoDB spend data, convert it to the CloudZero (Common Bill Format (CBF)), and create the data drop that can then be ingested and processed by the CloudZero platform.
This method is deprecatedThis version of the MongoDB Adaptor is no longer supported. If you would like to bring MongoDB spend into CloudZero, refer to Connection to MongoDB (Tier 1).
Step 1: Setup your ECR Storage
You will need to pull the CloudZero image into your own ECR instance. To do this, follow the steps below.
- Upload and register the CloudZero MongoDB Adaptor for Lambda container to your AWS ECR storage.
For more information, refer to the Push your image to Amazon Elastic Container Registry section of this AWS document.
- Copy the URI of the ECS container instance you created for use in later setup.
Step 2: Obtain a MongoDB API Key
In order for the adaptor to be able to access the data it needs from your MongoDB instance, you will need an API key.
-
Setup an API key according to the MongoDB Create an API Key documentation.
-
Make note of both the public and private keys for use in Step 3 below.
-
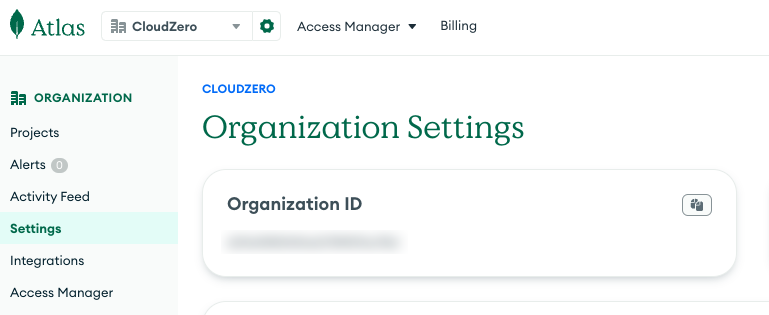
Find and make note of your MongoDB Organization ID for later. This is typically found in the Organization Settings of your MongoDB admin console.

Step 3: Setup the AWS Parameter Store
Your adaptor config settings will be using the AWS System Manager Parameter Store.
-
Setup a Parameter Store for your CloudZero MongoDB adaptor configuration values. You will need to add the parameters in the table below. You can use the encrypted storage option for any of the values as necessary.
Please Note: When adding these parameters, ensure they are all located on the same path, such as
/CloudZero/MongoDB_Adaptor/, and make note of that path for use later in the setup process.Configuration Description S3_BUCKETThis is the name of the S3 bucket you will be creating in Step 5 below. S3_BUCKET_FOLDERThis is the location of the S3 bucket you will be creating in Step 5 below. MONGO_DB_API_USERNAMEThis is the public MongoDB API key you created in Step 2. MONGO_DB_API_PASSWORDThis is the private MongoDB API key you created in Step 2. Ensure you store this as a SecretString.MONGO_DB_ORGANIZATION_IDThis is the MongoDB Organization ID you located in Step 2. MONGO_DB_TAG_NAMES(Optional) This is a StringListof MongoDB tag names to ingest as Resource Tags to CloudZero.
Step 4: Create and configure your AWS Lambda
You need to create and configure the Lambda function that will execute the adaptor from your ECS instance.
To do this, follow the steps below.
- Create an AWS Lambda using the Container Image template.
- Input the URI of your ECS instance created in Step 1.
- By default, the Lambda creation process will create a default execution role. We will use this role, so note its ID.
- In the Configuration tab of your Lambda settings, edit your General Configuration section.
- Set your
Timeoutvalue to 15 minutes andMemoryto 4GB. - Edit your Environment Variables section.
- Add the variable
SSM_PARAMETER_STORE_FOLDER_PATHwith the value of the location of your configuration variables in AWS Parameter Store. Be sure to include leading and trailing slashes (i.e.,/CloudZero/MongoDB_Adaptor/). - Optionally, you can add the variable
LOG_LEVELas defined in Python docs. Set a value ofDEBUGto enable debug logging. - Access the execution role auto created with the Lambda, and add the following policies.
"ssm:GetParametersByPath",
"ssm:GetParameters",
"ssm:GetParameter",
"kms:Decrypt"
Step 5: Setup your AWS S3 bucket
You will need to setup an S3 bucket where your adaptor will drop its files, and where the CloudZero platform will pull them.
To do this, follow the steps below.
- Create an AWS S3 bucket where the files will be stored.
- Grant the Lambda execution role that was auto created full access rights to this S3 bucket. For more information, see the AWS S3 User Policy Examples documentation.
- Update your
S3_BUCKETandS3_BUCKET_FOLDERvalues in your AWS Parameter Store (Step 3) to match this S3 bucket.
Step 6: Set Up Permission for Lambda to Access S3 Bucket
Everyone has there own way to setting up IAM. There are two options to set up IAM for Lambda to access S3 bucket. Generally only one option is needed.
- Add a policy to the Lambda function execution role to allow access to the S3 bucket. Add the following
  {
      "Sid": "S3BucketAccess",
      "Effect": "Allow",
      "Action": [
          "s3:GetObject",
          "s3:PutObject",
          "s3:ListBucket"
      ],
      "Resource": [
          "arn:aws:s3:::[S3_BUCKET]",
          "arn:aws:s3:::[S3_BUCKET]/*"
      ]
}- Add a resource policy to the S3 Bucket. Add the following to the resource policy
{
    "Version": "2012-10-17",
    "Statement": [
        {
            "Sid": "GrantLambdaExecutionRoleAccess",
            "Effect": "Allow",
            "Principal": {
                "AWS": "arn:aws:iam::[ACCOUNT]:role/service-role/[LAMBDA_EXECUTION_ROLE]"
            },
            "Action": [
                "s3:GetObject",
                "s3:PutObject",
                "s3:ListBucket"
            ],
            "Resource": [
                "arn:aws:s3:::[S3_BUCKET]",
                "arn:aws:s3:::[S3_BUCKET]/*"
            ]
        }
    ]
}
Step 7: Schedule your MongoDB adaptor
Once all the parts are in place, follow the steps below to setup the run schedule of your MongoDB Adaptor.
- Access your Lambda settings, and select the Add Trigger button.
- Choose the EventBridge (CloudWatch Events) trigger type, and select Create New Rule.
- Set the Schedule Expression to run on a regular cadence. We recommend coordinating this run on the same cadence as your MongoDB Billable usage logs delivery for optimal efficiency.
- Once added, your Lambda will begin executing at the set time, and you will begin seeing data drops in the S3 bucket you configured.
Step 8: Create a CloudZero billing connection
Once your files are successfully dropping to your S3 bucket, you will need to setup a CloudZero custom connection to begin ingesting this data into the platform.
For more information on how to do this, see Connecting Custom Data from AnyCost Adaptors.
Updated 19 days ago
