Users & Permissions
CloudZero uses role-based access control (RBAC) to manage who can see your cost data and what actions they can take in the platform. Each user is assigned one or more Roles that control both data visibility and platform permissions.
Users are managed in Settings > Users and Roles are managed in Settings > Roles.
New organizations start with two Roles:
- Member: The default Role. All users are automatically assigned to this Role. Grants full access to all spend data with read-only permissions.
- Organizer: Grants full access to all spend data and all permissions. The first user in the organization is assigned to this Role.
Organizers can create additional Roles, modify the existing Roles, and reassign users at any time. See View and Manage Roles.
Organizations created before the Member and Organizer Roles were introduced have a single Default Role instead. The Default Role functions like the Member Role and can be modified or replaced at any time.
Data access levels
Every Role has a data access level that controls what cost data users can see and which features are available.
| Level | Data visibility |
|---|---|
| Full Access | All spend data, all cost types |
| Limited Access | Spend data filtered by Dimensions and selected cost types |
| No Access | No spend data. Useful for service accounts or ops roles that manage the platform but do not need cost data. |
Feature access by level:
| Feature | Full Access | Limited Access | No Access |
|---|---|---|---|
| Explorer | Yes | Filtered | No |
| Analytics | Yes | Filtered | No |
| Optimize | Yes | Filtered | No |
| Anomalies | Yes | Filtered | No |
| Budgets | Yes | No | No |
| Dimensions Diagram | Yes | No | No |
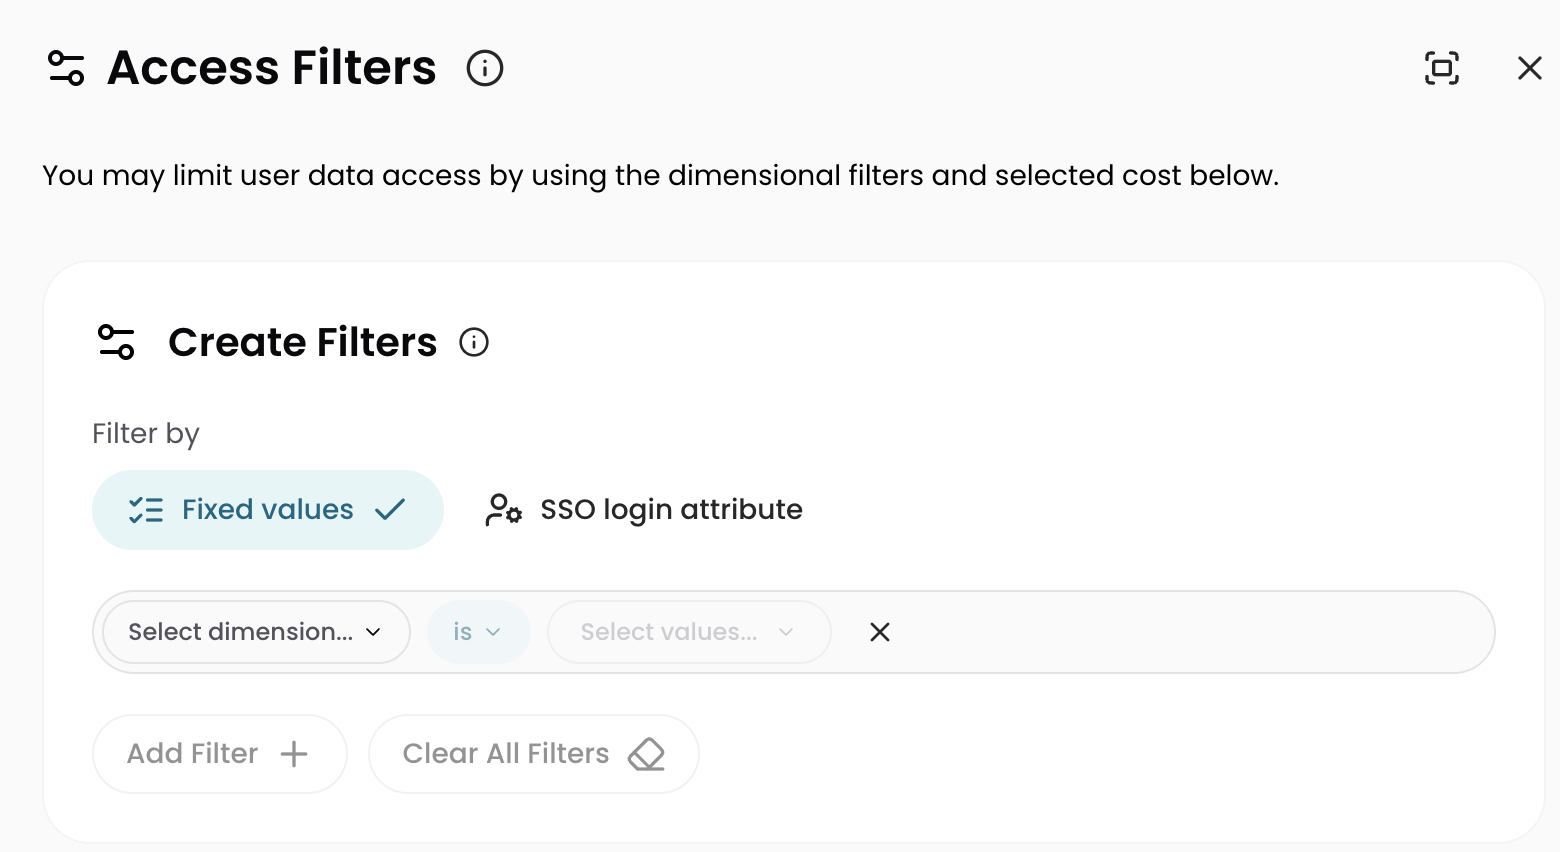
Limited Access filtering
When you create a Limited Access Role, you add at least one filter specifying which Dimensions users can access. Filters support an is/except toggle: is grants access to the selected values, except restricts access to the selected values.
After creating a Limited Access Role, filters typically take effect within one to two hours (up to 24 hours in some cases).
When you configure a Limited Access filter, you set Filter by to either Fixed values, with fixed Dimension values that apply to everyone assigned to the Role, or SSO login attribute, whose values resolve from each user's SSO attributes at login. A single Role that filters by SSO login attribute can serve many users, where each user sees only the data their attributes allow. For setup steps, see Filter by SSO Login Attribute.
The SSO login attribute option appears only for organizations with an active SSO integration. See Single Sign-On.
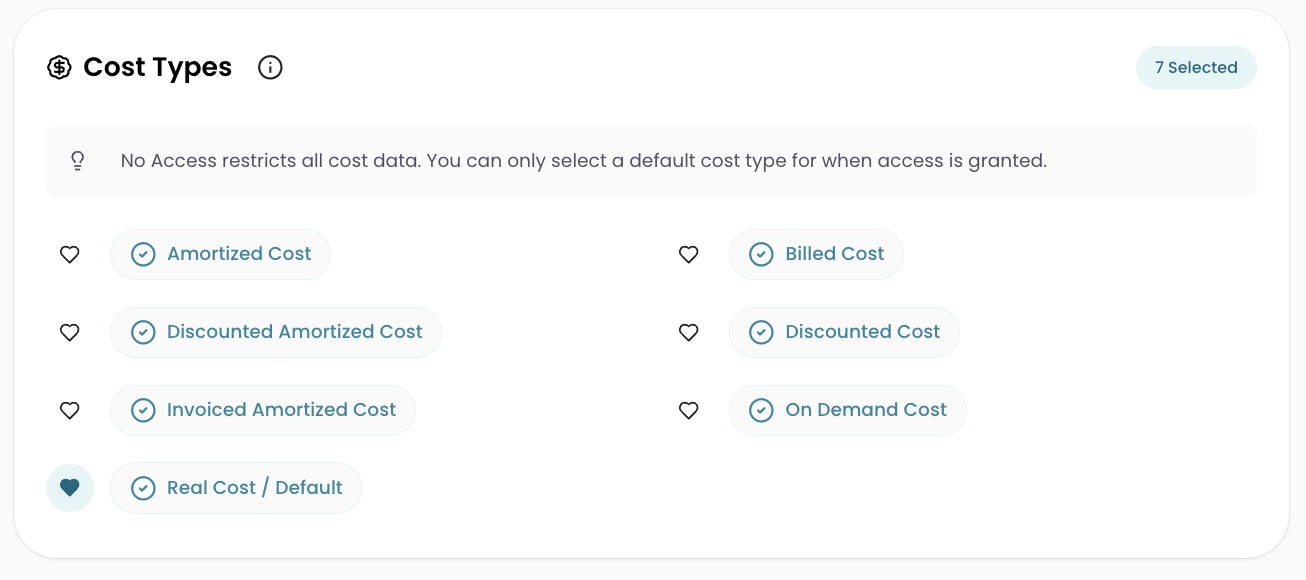
Cost type access
Data access also controls which cost types users can see in the Explorer and Analytics.
- Full Access Roles can view all cost types.
- Limited Access Roles can be restricted to specific cost types. Cost types not selected are hidden from users in the Explorer. If a user follows a shared link to a restricted cost type, Explorer displays an Access Denied error. In Analytics, restricted cost types display as $0.
- No Access Roles cannot view any cost types.
Both Full Access and Limited Access Roles allow setting a default cost type for users assigned to the Role.
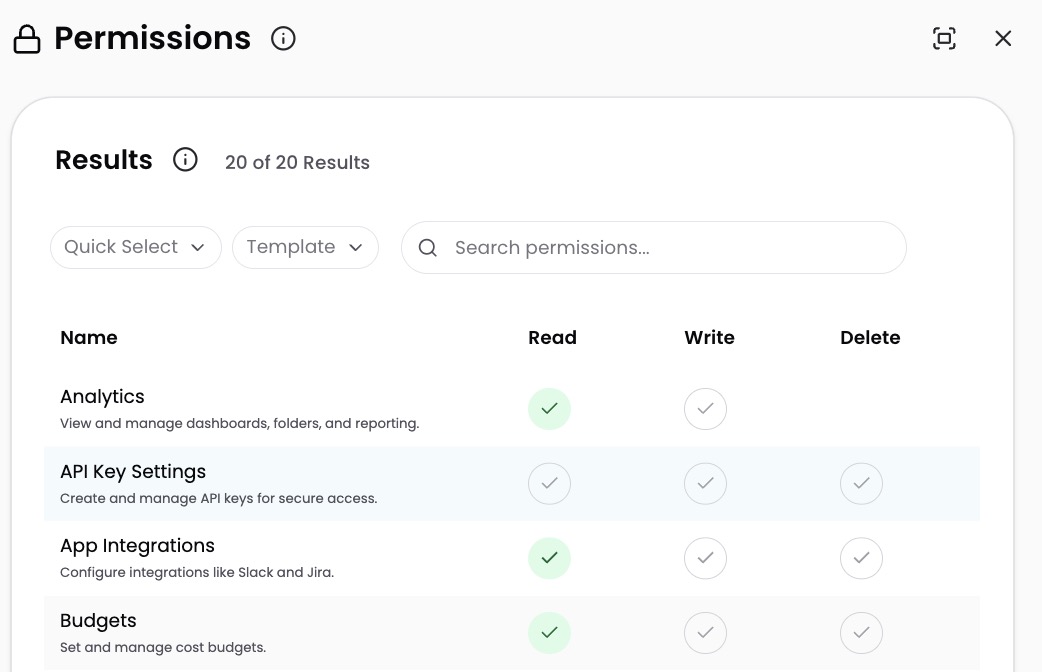
Granular permissions
In addition to data access, each Role controls what actions users can take in CloudZero. Permissions are organized into categories that align with features in the application (API keys, SSO settings, cloud connections, budgets, and more).
Permissions have logical dependencies. For example, granting Delete API Keys automatically enables View and Create/Modify API Keys.
Some permissions are system-level and always enabled; these are not visible in the permissions editor.
How multiple Roles combine
If a user is assigned multiple Roles, CloudZero combines the data access and permissions from all Roles into a single experience. This is called a union.
| Scenario | Outcome |
|---|---|
| One Role with No Access + one Role with Full Access | Full access to all spend data |
One Role with No Access + one Role with Limited Access to Team Donatello | Access to Team Donatello data only |
Two Limited Access Roles, one for Team Donatello and one for Team Michelangelo | Access to both Team Donatello and Team Michelangelo data |
| Permissions scenario | Outcome |
|---|---|
| One Role with view SSO Settings | Can view SSO Settings |
| One Role with view + another with modify and delete SSO Settings | Can view, modify, and delete SSO Settings |
To view the combined permissions for a user:
- Navigate to Settings > Users.
- Select the pencil icon on the user's row.
- Select the User Permissions tab to see the union of all assigned Roles.
Namespace-level access controls
Namespace-level access controls are in preview. Contact your account manager if you are interested in early access.
Roles can also restrict access to individual Dimension namespaces, controlling who can view and edit Dimension definitions. For details, see Namespace Access Control.
Manage users and Roles
- View and Manage Users: invite users, view user list, delete users
- View and Manage Roles: create, configure, and delete Roles; manage Role membership
- Manage Roles with SSO: automate Role assignment through your identity provider
- Filter by SSO Login Attribute: filter data access by each user's SSO attributes
- Namespace Access Control: restrict access to Dimension definition namespaces (preview)
Have questions or feedback? Reach out to your account manager.
Updated 5 days ago