Manually Configuring Azure Cost Management + Billing Exports
While connecting to an Azure account, CloudZero recommends using the Scripted option to automate and reduce errors in configuring the necessary Azure Cost Management + Billing Exports features.
However, there are manual steps you can follow to produce the necessary data for the platform to ingest your Azure costs, as outlined below.
It is suggested that you configure a specific Azure Storage Account for this export and that you create this account when creating the first of the four exports. However, this is not rquired. An existing Azure Storage Account can be used, but it MUST not have any type of storage firewall configured. This is actually a requirement for Cost Management + Billing Exports as documented in Tutorial: Create and manage exported data.
All exports must be placed within a single container of the same Azure Storage Account under required directories for the cost type and frequency of the export.
| Export Name* | Metric | Export Type | Directory‡ |
|---|---|---|---|
| cloudzeroactualdaily | Actual cost (usage and purchases) | Daily export of month-to-date costs | actual-cost/daily |
| cloudzeroamortizeddaily | Amortized cost(usage and purchases) | Daily export of month-to-date costs | amortized-cost/daily |
| cloudzeroactualmonthly | Actual cost (usage and purchases) | Monthly export of last month’s costs | actual-cost/monthly |
| cloudzeroamortizedmonthly | Amortized cost(usage and purchases) | Monthly export of last month’s costs | amortized-cost/monthly |
* The export names may be different from what is suggested above
‡ The directory names for each of these exports is required and MUST be set as specified
All four exports:
- File Partitioning:
On - The following names may be different from what is suggested, but the same storage account and container MUST be used for all exports
- Storage Account:
customercloudzeroexports - Container:
cz-billing-data-export
- Storage Account:
Create Billing Exports
Repeat the following instructions for each of the four columns in the previous table to create the exports:
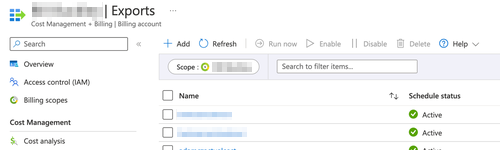
- In the Azure Portal, open Cost Management + Billing
- Click Exports
- Set Scope equal to your Billing Account (the scope with the Green Ring Icon with the $ inside)
- For each of the four exports above:
- Click + Add
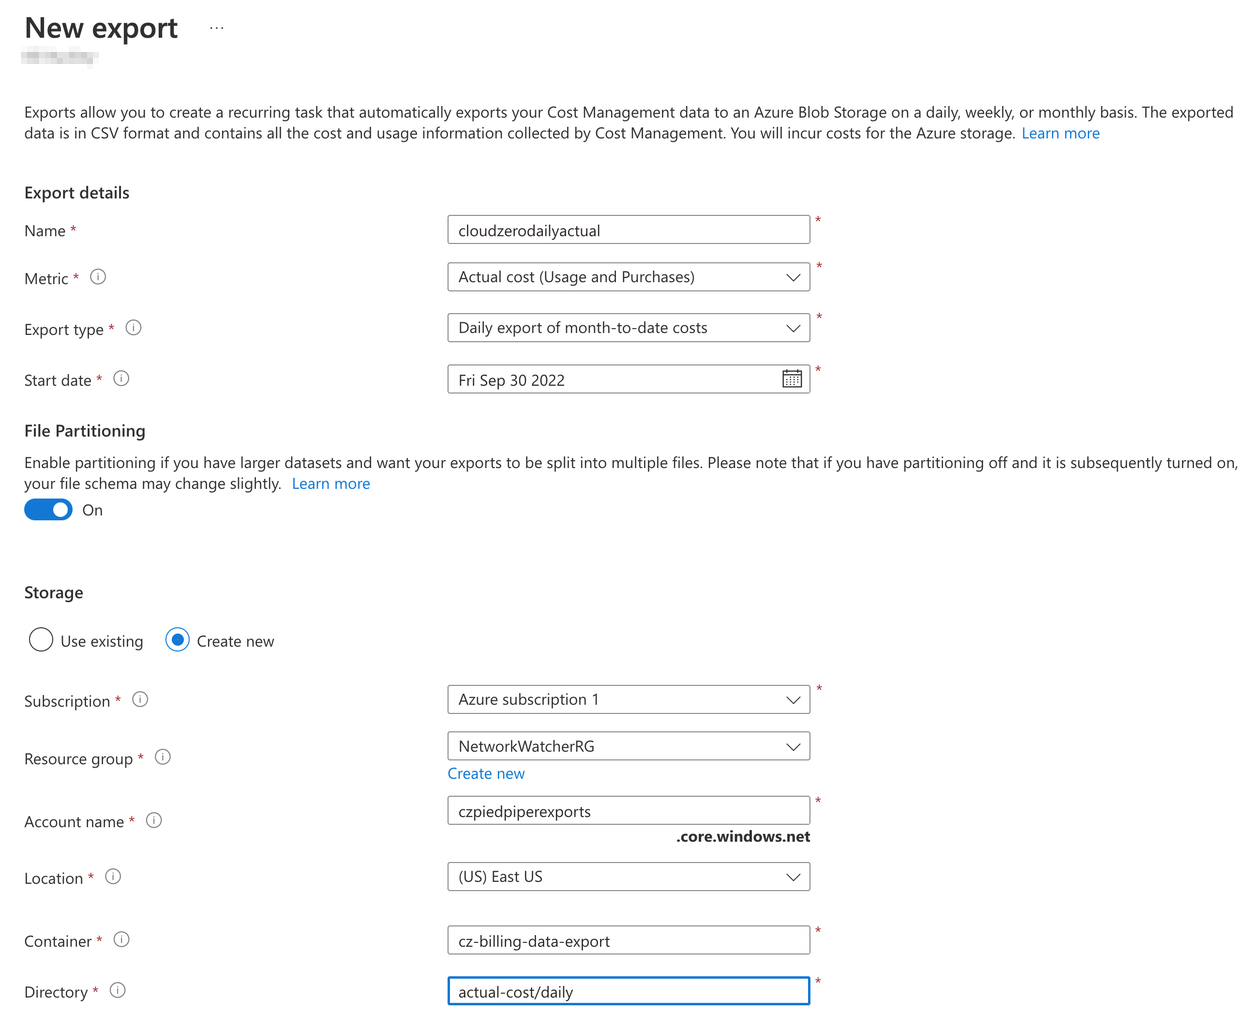
- Fill in Export details from the table above:
- Name: Fill in the report name from the Export Name column in the above table
- Metric: Select the metric from the Metric column in the above table
- Export type: Select the export type from the Export Type column in the above table
- Start date: (today’s date for daily reports only - it is disabled out for monthly exports)
- Turn File partitioning On
- Storage: Select Create New for the first export and you intend to create a specific storage account. Otherwise select Use Existing (NOTE if you decide to use an existing Storage Account instead of creating one here, it must NOT have a Firewall as described in Tutorial: Create and manage exported data)
- Subscription: Select subscription for where you want to create the Storage Account or where it already exists.
- If you are creating a new storage account:
- Resource group: Enter the name of the resource group you would like this storage account to be contained, suggested CloudZeroIntegration
- Account name: Fill in name for new Storage Account, this needs to be globally unique, suggested customercloudzeroexports
- Location: US East
- If you are using an existing storage account:
- Storage Account: Select the storage account you would like to place the exports in. If you created a new account when creating a previous export, you must select that same account.
- Container: fill in name according to the Container column in the above table
- Directory: fill in path, according to the Directory column in the above table
- Click Create
- Click + Add
- Manually Run Each Export
- In the Export List
- Click on each export name hyperlink (sliding open the flyout)
- Click Run now
Grant Access to the Billing Exports
You will need the following information for this next step:
- Azure Multi-Tenant App Name: the name of the multi-tenant app name that will be used when Snowflake connects to the storage container:
SnowflakePACInt3249_1647296017972
Complete the following steps to give CloudZero’s Snowflake Storage service principal access to the Storage Account created above:
- Log into the Microsoft Azure portal
- Navigate to Azure Services » Storage Accounts. Click on the name of the Storage Account you are granting the Snowflake service principal access to (the one created for the billing exports)
- Click Access Control (IAM) » Add role assignment.
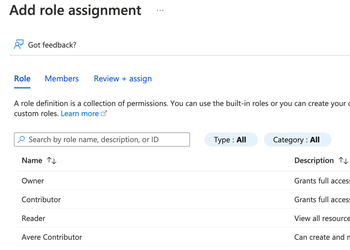
- Select the desired role to grant to the Snowflake service principal:
- Storage Blob Data Reader grants read access only. This allows loading data from files staged in the storage account.
- Search for the Snowflake service principal, this is the string before the underscore in the Azure Multi-Tenant App Name property
- It can take an hour or longer for Azure to create the Snowflake service principal requested through the Microsoft request page in this section. If the service principal is not available immediately, we recommend waiting an hour or two and then searching again.
- If you delete the service principal, the storage integration stops working.
- Click the Save button.
Grant Access to the Billing API
In an earlier step, you consented to CloudZero’s multi-tenant app, and will now need to give it read permissions to access “Cost Management & Billing” APIs. The data that is provided by the Billing Exports configured in the previous step does not include important data that is critical for financial reporting, including items like taxes.
CloudZero must be able to read invoices to determine the taxes assessed. Additionally, the platform must be able to re-run the monthly export after the month has been closed and the invoice generated so that the platform can ingest any adjustments made to the usage report as part of the month close.
Note: Enterprise Agreement (EA) customers currently do not receive some taxes and fees information through this API.
For MCA accounts, perform the following steps:
- Log into the Microsoft Azure portal
- Navigate to Cost Management + Billing
- Click Access Control (IAM) » Add role assignment
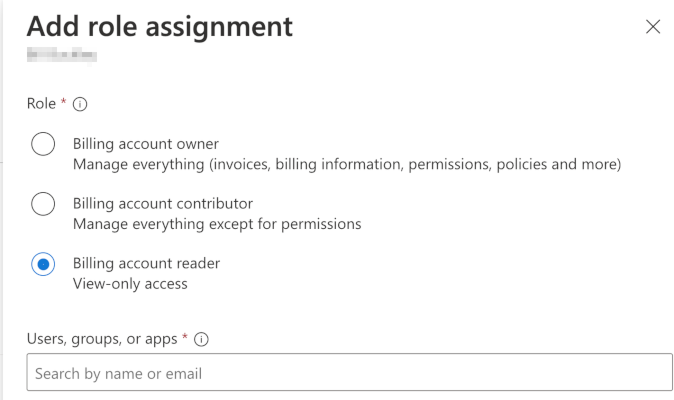
- Select the desired role to grant to the CloudZeroPlatform service principal:
- Billing account reader grants read access only to billing and invoice data. This allows CloudZero to determine invoice details not found in the exported data from above, like taxes assessed on the usage.
- Search for the CloudZeroPlatform service principal
- It can take an hour or longer for Azure to create the CloudZeroPlatform service principal requested through the Microsoft authorization screen from the earier step. If the service principal is not available immediately, we recommend waiting an hour or two and then searching again.
- If you delete the service principal, the CloudZero Platform will not be able to provide fully accurate financial reports.
- Click the Save button.
For EA accounts, perform the following steps:
- Log into the Microsoft Azure portal
- Follow the steps in this article: Assign enrollment account role permission to the SPN
- Ensure that you are granting the Enrollment Account role permission to the CloudZeroPlatform service principal you authorized above.
Save the Connection
Once you have completed all of these manual steps, return to the CloudZero New Azure Connection screen and provide the following information based on what you just created:
- Storage Account: This is the URL of the storage account re-used or created where the Billing Exports will be stored
- Container Name Path: e.g. “cz-billing-data-export” or whatever name you chose to use
Updated almost 2 years ago